Overwatering is a common mistake many aloe vera owners make, and it can be detrimental, leading to root rot in the plant. Root rot is a nasty fungal disease, and if left unchecked, it can spell the end for your beloved aloe.
Wondering if your aloe vera is getting too much water? Look for yellow, mushy leaves and a decaying root system. If you spot these signs, here’s what to do:
- Gently remove the aloe from its pot and lay it on the ground.
- Use a fungicide on the healthy roots, and trim away the infected parts.
- Repot the plant in fresh potting soil, making sure not to overwater in the future.
Don’t worry; it’s not too late! With the right steps, you can save your aloe vera. In this guide, I’ll walk you through how to rescue an overwatered aloe and share tips on how to water it just right.
Contents
- What Does an Over-watered Aloe Plant Look Like?
- Differences Between Under and Overwatering
- Can You Save an Overwatered Aloe Plant?
- How to Revive a Severely Overwatered Aloe Plant
- Now, Why is My Aloe Overwatered?
- How to Keep That Moisture Level Perfect
- How to Water Aloe Vera Plant
- Common Mistakes in Watering Aloe Plant
- Final Words
What Does an Over-watered Aloe Plant Look Like?
Drooping leaves with a soft soggy feel are an obvious sign of overwatering, but this condition is easily remedied with a few simple techniques.
It is also simple to avoid. Your aloe starts to show signs that it is in pain.
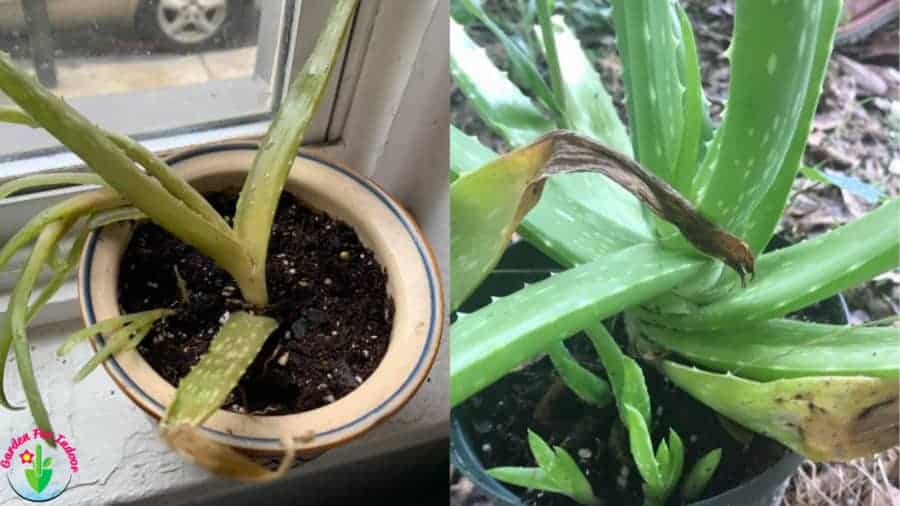
Signs of Overwatered Aloe Plant
- The aloe leaves are getting mushy
- The stem and leaves become soft
- The outermost leaves turning brown from the tips
- Aloe Vera plant Turning Brown
- Mold growing in soil
- Leaves got blistered cells absorbing excess water
Differences Between Under and Overwatering
Frustratingly, for the less experienced gardener, it can be quite easy to confuse the symptoms of these very different problems.
The most confusing symptom is that in both cases, the leaves droop, and inexperienced gardeners are not sure what course of action to take.
Fortunately, there are other symptoms to look out for that will make diagnosis much easier. You need to get that diagnosis correct in order to treat the problem.
| Overwatering symptoms | Underwatering symptoms |
| Leaves droop like underwatered plants but are mushier. This indicates overwatering rather than underwatering. | The first thing you’ll notice is that the leaves droop and hang over the pot’s edge. |
| The leaves will have begun to fade and lose their natural bright green color. | Leaves will become thin and turn yellow. |
| The soil will feel wet, indicating whether you are under or overwatering your plant. | This is often accompanied by brown tips. |
| Tip the plant from the pot and you may notice a damp swampy odor. | Some leaves have dry, brown patches on the edges that are desiccated. |
| The root ball may be wet and rotting. They are brown and soft instead of white and firm. | Tipping the plant out of the pot reveals brittle roots and dry, powdery potting soil. |
Read this article to revive your underwatered aloe vera plant.
Can You Save an Overwatered Aloe Plant?
The exact answer to this question is maybe. It all depends on how quickly you took action upon recognizing there was a problem, and how far advanced that problem has become.
These are delightful plants and it is definitely worth trying to revive them. They are extremely robust, so hopefully, you have caught the problem in time to turn things around.
As with so much of house plant care, the main weapon against health problems is close and regular attention to the plants you are responsible for.
Now, let’s take a look at some actionable tips to save your overwatered aloe plant.
How to Revive a Severely Overwatered Aloe Plant
Drooping leaves with a soft soggy feel are an obvious sign of overwatering, but this condition is easily remedied with a few simple techniques.
It is also simple to avoid. Your aloe starts to show signs that it is in pain.
Treatment for an overwatered aloe depends on the severity of the symptoms. I will examine three scenarios and provide appropriate responses.
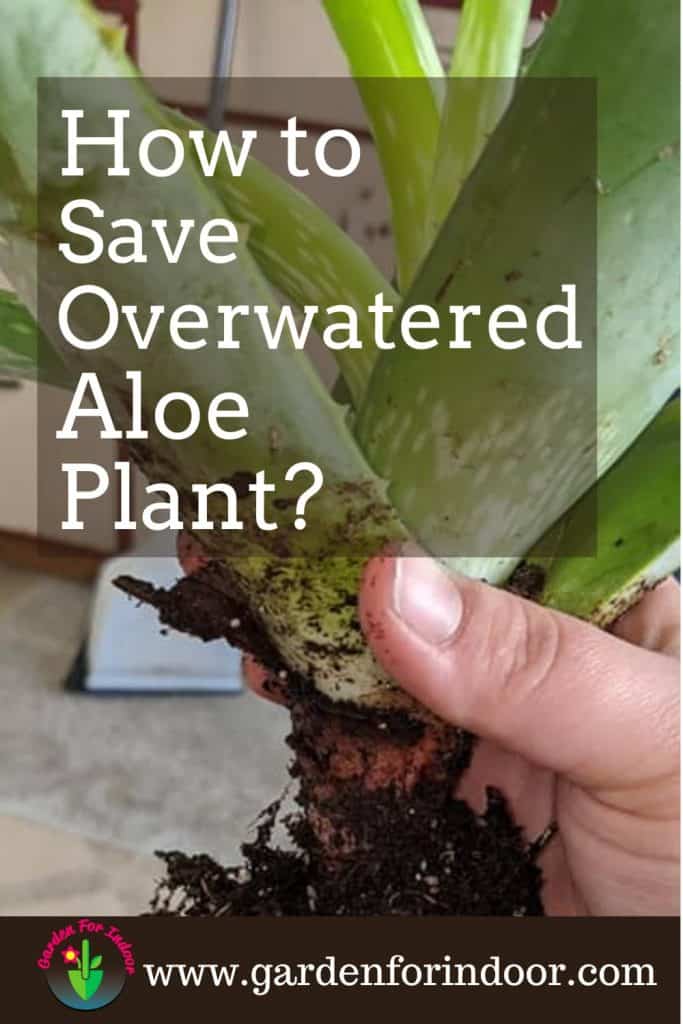
Here’s What I Would Do in Your Situation (Step-by-Step)
- Remove the aloe from the pot and shake off any loose potting soils. Try to remove as much soil as possible without damaging the roots. You can do it with a wooden toothpick like the one used in Chinese restaurants.
- The drying out process might take two or three days. Cover the roots with paper (newspaper or similar). In an area such as the garage or semi-basement. It should be in indirect light as it will not be in any condition to tolerate bright sun. There should be no heating and the temperature does not drop below 5ºC/41°F.
- Once the roots and any remaining soil are dry, examine them and prune away roots that have started to rot and turn brown.
- Cut away damaged root material until you hit clean healthy root matter that will be both white and firm.
- Damaged leaves that look like they cannot be saved can also be cut away.
- Dust the roots with a fungicide powder (check the price on Amazon here) that you will be able to purchase at most garden centers.
- Repot your plant into a suitable potting mix. Prepare a well-draining substrate; 50% potting mix and 50% stones of different sizes. Examples are River Rocks, Pebbles, Outdoor Decorative Stones, and Natural Gravel. (which you can find them here). These are perfect for use in the pot to facilitate drainage.
- Use a pot that has enough drainage capacity but is the same size as the one from which your plant was just removed. If you reuse the same pot, sterilize it thoroughly with bleach or boiling water so that no residual diseases are transmitted.
- Stand the plant in a position with bright, indirect light, and don’t water it again until the soil is dry. Gradually, the plant will regather its strength and start to produce new healthy leaves from its center.
- If you are from a very cold area, I do not recommend leaving it outdoors.
How to Save Overwatered Aloe Plant With Mild Symptoms
Your aloe vera is looking a bit off-color and droopy and upon feeling the potting soil you notice that it is cool and slightly wet.
- First and foremost, stop watering. These are succulents and they can go for a long time without water.
- Make sure that the pot can drain freely. It should have a hole in the base large enough to get the tip of your finger into, and the pot must not be standing in a saucer of water.
- Allow the soil to dry out completely and keep a constant eye on the aloe vera to see that it is regaining both color and texture.
- Make sure that the plant is in an ideal position to recover in that it has plenty of bright but indirect light.
- Once the soil has dried out and its condition has begun to improve, you can look at watering again using the watering technique laid out later in this article.
What If Overwatered Aloe Vera Is Impossible to Revive
Once your Aloe has been overwatered beyond a certain point, it will not be possible to save it.
All is not lost yet, however, and now it’s time to start looking at what can be propagated so that you don’t face a total loss.
The easiest way to do this is to look for plantlets at the base of the plant which are called pups. These can be cut away from the parent plant with a sharp and sterile knife and then potted into a new potting mix.
Keep the soil very slightly moist and stand in a bright position and these young plants will soon start to grow into plants that are exact clones of the parent plant that you have lost.
Some growers like to start their pups off by growing them in a container of water until the first roots have begun to form.
Personally, I don’t favor this method because these plants are so averse to having their feet wet.
Your pup is coming off an already weakened plant and will not be in peak condition so plant it into a suitable potting soil and let it grow there to avoid root rot.
In the case of there not being any pups available, and this is a real possibility, you need to examine your plant to see if there is any leaf material still healthy enough for you to use as a source of leaf cuttings.
If you find some healthy leaves, cut off three inches or so of the tip of the leaf. Leave the cutting for several days until it has time to develop a callus over the cut.
If you plant the cutting directly, it will almost definitely develop root rot and fail.
With a protective callus, it can be pushed into the potting mix to around half its depth and stood on a bright windowsill where it should soon start to put out roots and grow again.
Now, Why is My Aloe Overwatered?
There are a number of reasons that you might be experiencing overwatering problems.
But without a doubt, the most common of these is a well-intentioned desire on behalf of the plant owner to keep her/his aloe vera happy.
In the next section we will look at a good watering regime to keep your Aloe in peak condition, but for now, let’s look at some other possible causes of excess moisture.
Insufficient Drainage Capacity In The Pot
A pot needs a hole in the bottom for the extra water to escape through. If it doesn’t have this, water builds up and the plant quickly suffers.
There should be a hole large enough to get the tip of a finger into or several smaller holes.
Soil Is Too Moisture Retentive
Aloes need free-draining soil and if you plant your Aloe into an ordinary potting mix, it will have been designed to retain moisture rather than drain quickly.
You can overcome this problem by using a proprietary cactus mix or you can make ordinary potting soil drain more efficiently by adding river sand, grit, or perlite.
It doesn’t really matter which of these you opt for, but mix in around fifty percent of whichever material you choose, along with fifty percent good house plant potting soil.
Weather Conditions
If the humidity in the air is high, it stands to reason that the soil and the plant will both lose less moisture.
This is fine if you alter your watering regime accordingly, but if you continue to water as though the conditions were dry, you may well cause excess moisture to accumulate at the roots.
Choosing Your Pot
The pot size should be slightly larger than the root ball of your Aloe.
When the plant grows enough to be potted up into a larger container, use one that is roughly an inch larger in diameter than the container used previously.
It can be very tempting to pot up into a much larger pot thinking that this will provide more room for those growing roots. Instead, that soil retains moisture and you risk overwatering once again.
How to Keep That Moisture Level Perfect
This is the secret to having happy house plants, and although it is easy to master, it is the one mistake most commonly made.
Firstly, you need to know what the moisture requirements of your plants are, and then, you need to provide those conditions on a consistent basis.
We already know that this plant is succulent and that it comes from the desert regions of North Africa. That tells us that it does not need lots of water.
That is confirmed by the fact that those thick succulent leaves are able to retain water and so we gardeners don’t need to be watering constantly.
To keep your Aloe really happy, you need to allow it to dry out between each watering.
For many gardeners, this feels counter-intuitive. After all, if you have a guest in your home, it is only polite to ensure that he or she is well-fed.
Constantly watering aloe vera in the misguided belief that it will be happier, and therefore grow faster, probably results in more plant deaths than any other single cause.
My secret weapon in regard to house plants is the tip of my forefinger.
By poking it into the soil to the depth of two inches, I am able to feel if the soil is dry or if there is still some moisture lurking in the depths.
With the Aloe, I want the soil to be dry before I even consider watering. The plant has good moisture reserves in those leaves so it won’t suffer from an extra day or two without water.
If you lack confidence in your ability to feel for moisture, or if you have just spent fifty dollars on a manicure, you might prefer to use a moisture meter.
These inexpensive devices are available at garden centers and consist of a probe that you poke into the soil and which then gives you a reading to tell if the soil is wet, damp, or dry.
How to Water Aloe Vera Plant
Once you have ascertained that your Aloe is definitely in need of water, then this is the procedure you should follow.
- Place the pot in a sink or basin and water the top of the soil until water starts to flow from the drainage holes in the bottom of the pot.
- Preferably, use captured rainwater or purified water. Ordinary domestic tap water contains chemicals, the most notable of which is chlorine. Over time, these chemicals build up in the soil and they become toxic to your house plants.
- Once you have applied sufficient water, allow time for the excess to drain away. It is all too common for people to return the pot to its saucer while it is still dripping. The extra water becomes trapped by the saucer preventing complete drainage. The roots of your Aloe remain damp and the whole overwatering problem can start again.
The most important piece of advice I can offer when it comes to watering is that you need to check the moisture level of the soil regularly.
Don’t be tempted to water on a weekly or twice-weekly schedule as the evaporation rate will be affected by a number of factors such as heat, weather conditions, and even the size of your plant.
Instead, get into the habit of checking the moisture levels regularly and water according to the plant’s needs rather than to some predetermined timetable.
Common Mistakes in Watering Aloe Plant
As you already know how harmful improper watering of aloe can be! So, let’s know about frequent watering mistakes made by aloe growers:
- Very often, plants are watered from above. For aloe, you should avoid this mistake. Since it leads to the appearance of spots on the leaves. If there is dust on the leaves, wipe it with a dry soft cloth.
- You may see that aloe leaves drooping. This may be due to the fact that you have used too cold water. This is especially dangerous in the summer. If there is a significant difference between the temperature in the room and the temperature of the water, it will cause irreversible harm.
- Excess water stagnant in the pan leads to the development of bacteria and fungi. This can provoke strong rotting and death of the roots. It is important to monitor this in winter if the pot is located on the windowsill. Because in this case, the root may have severe frosts, the bottom can freeze.
- The plant dies with insufficient watering. This demonstrates itself in the form of wilting, thinning leaves. Provide enough water for your plant growth.
- Inappropriate watering is considered a common mistake. Do not water aloe every day, as this leads to rotting of the roots. This usually indicates itself in the form of a white or rusty coating that occurs on the ground.
Final Words
Now that you know how to save your overwatered aloe plant. You can easily grow this beautiful and beneficial plant within your home. If you follow the above tips you don’t have to worry about your aloe plant health anymore.


