Root rot, disease, or physical damage can cause Aloe Vera pups to lose their roots, needing immediate attention and support.
You still have time to save these precious trinkets if you act quickly. Also, it’s a cinch to do.
Aloe Vera pups can be grown from a rootless shoot after first allowing the base to callus over and then planting into an appropriate growing medium. Planting the aloe pups in a pot or watering them until their roots have taken hold is an option.
Contents
Will Aloe Vera Pups Grow Without Roots?
Roots are essential for any plant to thrive. The soil’s water and nutrients are delivered to the Aloe through its root systems.
As a bonus, they help to keep the plant upright, away from disease-causing fungi and bacteria that live in the soil.
An aloe vera pup is a small offshoot or side plant that can appear alongside a mature plant.
It’s one of the ways Aloe Vera propagates in the wild, and it’s a great way to reproduce them at home.
These tender new plants usually develop tiny delicate root systems and their infant leaves, but it is not uncommon for these fragile plants to lose their roots.
The developing root system may succumb to rot or dry out due to insufficient water and snap away at some point in time.
It’s also possible for a pup to be separated from its parent plant during a rough repotting or an accident, such as a pot falling from a window ledge.
The succulent nature of Aloe Vera plants means that they can survive for a long time without any roots.
Instead, they rely on the water already present in their leaves to keep them healthy. There will be no new growth from the plant if you do this permanently.
The good news is that it’s easy to get an Aloe Vera pup to grow a robust root system.
After that, it’s just a matter of providing the right conditions and allowing nature to take its course for succulents like this one.
How Do You Remove An Aloe Plant From A Parent?
Removing a baby Aloe Vera plant from its mother plant is usually a delicate one.
Identifying a pup that has matured enough to be separated from its parent plant necessitates meticulous root dissection.
Both the new and the old plants benefit significantly from the intact roots.
Conversely, any injury to a plant’s root system can slow its growth down to a crawl, making it more susceptible to disease.
As a side note, rootless pups are easier to remove from their parent plants because they don’t have any roots to attach to.
It’s easier to accomplish and poses a minor threat to the parent plant’s health.
Remove the rootless pup from the parent plant’s pot by finding it and removing it from its container. If it genuinely has no roots, it will simply lift free.
Pups that can reproduce are generally about 20% of the size of the parent plant in weight.
Therefore, however small, any pup that has lost its roots will require human intervention to ensure its survival.
How Do You Root An Aloe Pup?
Most succulents don’t need more than the right conditions to grow new roots. Aloe pups are no different.
It won’t take long for the pup to regrow its root system if the moisture levels and temperatures are consistently warm.
Allowing the pup to dry out across the plant base is critical when propagating a rootless pup.
As the tissue dries, it thickens and becomes more robust, resembling the leaf’s surface. In addition, the Aloe Vera pup’s callous protects it from rotting from the bottom up.
Propagation by Aloe Pups Without Roots
You will need:
- The Aloe Vera plant you wish to propagate
- Growing medium
- Small pot
- Clean shears or scissors
- A plant mister contains clean water.
- Chopstick or small plant stake (optional)
Step 1: Pick The Best Offshoots
If your parent plant has been damaged or is infected with root rot, you should only propagate a few of the most vigorous pups. Look for the following:
- good size – around 20% the size of the parent
- good color – bright, vibrant greens
- good condition – leaves that are thick, juicy, and unblemished
Step 2: Separate Offshoots From The Parent Plant
Detach the pup slowly and gently from the mother plant. You’ll want to save as many roots as possible for the new puppy.
When reclaiming pups from a sick plant, remove any black or rotten roots that may still be present.
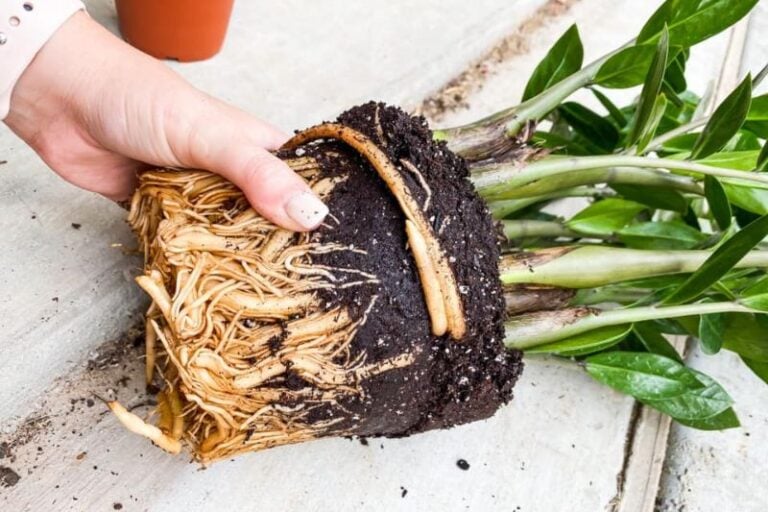
They must be clean and pale, like spaghetti. Remove any remaining soft and mushy roots with an unpleasant odor or are orange, brown, or black.
Step 3: Allow The Pup To Callous
This is a critical step. Your newly extracted pup must be kept in a cool, shaded area for at least two days to allow the plant’s wound to heal.
It will eventually dry out and form a protective layer over the vulnerable tissue area.
I cannot emphasize enough the significance of allowing that callous to develop. Take your time, and don’t rush through this step!
The Aloe Vera pup is vulnerable to fungal or bacterial infections if it lacks the callous. It’s also just as likely to rot away.
You’re ready to plant the pup when the base of the pup has developed a dry layer of callous.
Step 4: Pick An Appropriate Pot
You should plant it in a small and shallow container for young pups.
Remember that your Aloe Vera doesn’t have any roots and can’t get water below the soil’s surface.
If you use a deep pot, the moisture will build up, leading to the growth of pathogens.
Material is also an important consideration. For example, you can use terracotta to keep your Aloe Vera from getting hurt by over-watering because it is porous and will let the water drain away.
Heavy-walled ceramic or stone is also excellent for maintaining root systems cool and safe. A terracotta dish with a shallow depth is ideal.
The growing medium will not become waterlogged due to this method because it keeps moisture where it is needed the most. (Check out the prices on Amazon here)
Step 5: Prepare The Potting Mix
It is best to use a loose, well-draining mix with a lot of coarse sand and gravel for Aloe Vera plants to thrive.
I prefer to mix my own with one-half potting soil and one-half coarse sand, with a few good handfuls of gravel thrown in for good measure.
A commercial cactus or succulent soil blend is an option if you don’t want to deal with the hassle of making your soil mix. It will get the job done without a lot of fuss. (Check out the price on Amazon here)
Step 6: Plant the Pup
Adding the calloused pups to the soil is required once you have your growing medium in place. Place them in the manner you want them to grow – base down leaves pointing up.
A chopstick or something similar may be necessary if you’re dealing with a large pup that needs to be held in place.
Perhaps no deeper than an inch or two, a small hole will suffice to keep an Aloe Vera pup from falling over.
Step 7: Support Root Development With Good Care
The newly planted Aloe Vera pup will now need to be cared for to promote root growth.
By spraying the growing medium’s surface with a mister, you can ensure that the medium remains moist but not saturated.
You’ll also need to provide it with as much bright, indirect light as possible.
Will Aloe Pups Grow Roots In Water?
Getting succulents to root in water is always a challenge. It’s easy to end up with rotting leaves and no plant because of the wetness of the leaves at the start of the process.
That doesn’t mean you can’t grow Aloe Vera in water. Aloe Vera can be grown in a vase or jar, and I’ve written extensively about the process here.
Although these plants are mature, they are also important because they already have established root systems.
As a result, they don’t face the same dangers as a pup without a home base.
Allow your Aloe Vera pup to grow roots in the loose growing medium listed above before transplanting.
Then, it’s time to move them to their proper container once they’ve matured and developed a robust root system.
This is a much better strategy for both the plant and the grower. But, in the end, it’s the transformation of a sickly plant into its natural splendor that’s truly magical.


