Have you noticed some yellowing leaves on your beloved Plumeria and are a bit concerned? Don’t worry; you’re not alone. Various factors can cause yellow leaves on plants, but many of the causes of wrinkled or yellowing leaves on Plumeria are due to the growing environment.
Plumerias have a preferred environment for healthy growth; if they’re not properly conditioned, the leaves can develop various problems.
So don’t let yellow leaves bring you down; I’ll shed some light on the situation and determine the best action.

Contents
- 1- Plumeria Prepares for Dormancy as Temperatures Fall
- 2- Yellowing Leaves? Your Plumeria is Thirsty
- 3- Understanding and Solving Overwatering and Yellowing Plumeria Leaf
- 4- Lack of Nutrients
- 5- Solving Yellowing Leaves in Plumeria Due to Overfertilization
- 6- Pests Causing Yellowing of Plumeria Leaves
- 7- Anthracnose Disease Causes Yellow Leaves
- 8- Poor Ventilation
- 9- Understanding and Preventing Yellowing Due to Leaf Scorch in Plumeria
- 10- Natural Aging of Leaves
- Should You Remove Yellow Leaves?
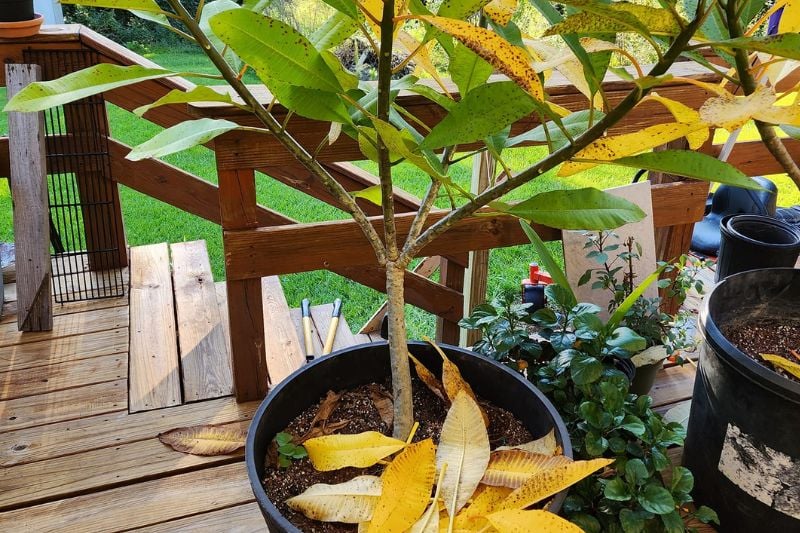
1- Plumeria Prepares for Dormancy as Temperatures Fall
As temperatures drop, it’s time to prepare our plumeria plants for winter dormancy. If you have your Plumeria in a pot, bring them indoors by November and move them into the greenhouse by the first week of December.
You may notice the leaves turning yellow and the lower leaves starting to fall off, but don’t worry; this is entirely normal. Your Plumeria doesn’t need any fertilizer during this time, so you can relax and enjoy the show.
When it comes to watering, less is more. Give them a light misting early in the morning, or use a jar and water just enough to dry out the soil in the evening.
Aim for once a week or every two weeks. Trust me; your Plumeria will thank you for giving them a little break during this time.
Stop Watering When The Plant Goes Dormant
As the seasons change and the temperatures drop, it’s time to prepare our beloved plumeria plants for winter dormancy.
When the leaves start to fall off from the lower leaves and new shoots stop developing, it’s time to stop watering your Plumeria.
Now, I know what you’re thinking, “But won’t my plumeria die without water?” During this dormant period, overwatering can do more harm than good.
Root rot is the most common cause of plumeria failure, so plant them in regular or well-drained soil.
But wait, there’s more! Some varieties of Plumeria may not go dormant during the winter months and keep their foliage thick.
In this case, give them a small amount of water during the warmer daytime hours, but ensure the soil is dry by evening. A little extra light during the short winter days can also help.
And, even if your Plumeria is dormant, it may not get enough water due to room temperature and other factors.
So, if you notice deep vertical wrinkles appearing on the trunk of your Plumeria, it’s time to give it a little extra humidity.
Now, for the big question, where should you place your dormant Plumeria? A bright place with minimal temperature fluctuations is best.
But, even during the dormant season, putting them outside in the sun for a few hours a day can do wonders for their growth and blooming.
So, let’s give our plumerias the TLC they deserve and watch them come back to life and bloom beautifully every year.
2- Yellowing Leaves? Your Plumeria is Thirsty
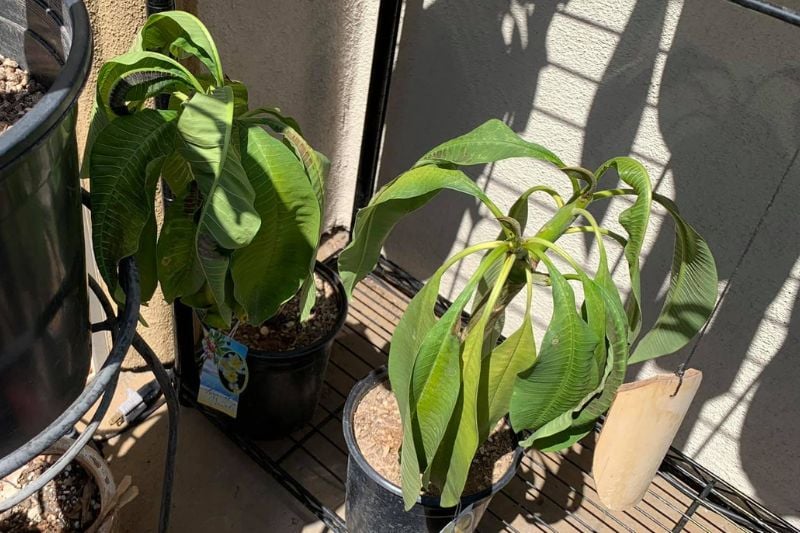
Are you noticing some yellowing or wilting leaves on your beloved plumeria plants? The most likely culprit is a lack of water.
Think about it, just like us; plumerias need water to survive and thrive. They absorb water from their roots to absorb nutrients and store energy for photosynthesis.
Without enough moisture, they can’t get their energy levels up, and their growth slows down.
So, before you start suspecting any other issues, check the condition of the soil. If it’s feeling a little dry, give your Plumeria a good drink of water.
Make sure the water flows out from the bottom of the pot and dispose of any water accumulated in the pot tray.
And voila! If lack of water was the problem, your Plumeria should start to perk up in no time. But, if the leaves are wrinkled or yellowed, they won’t return to their former glory. In that case, it’s best to cut them off.
3- Understanding and Solving Overwatering and Yellowing Plumeria Leaf
It could be the silent killer: waterlogging. It’s easy to give your Plumeria too much water in that tiny pot in your apartment, but don’t worry; the drainage holes at the bottom will take care of excess water. But, when you water too often, things get easier.
Too much water and not enough oxygen can lead to root rot and suffocation. And by the time you see yellow leaves, it’s often too late to save your plant.
But don’t worry, I’ve got you covered with this article on how to treat root rot article, which will show you exactly what to do if you suspect waterlogging and root rot.
A good rule of thumb is always to use the finger test: stick your finger into the soil, and if the first few inches are dry, it’s time to give your plant a drink.
Remember, most plants do better with short dry spells than being overwatered. So don’t let waterlogging be the death of your beautiful Plumeria!
4- Lack of Nutrients
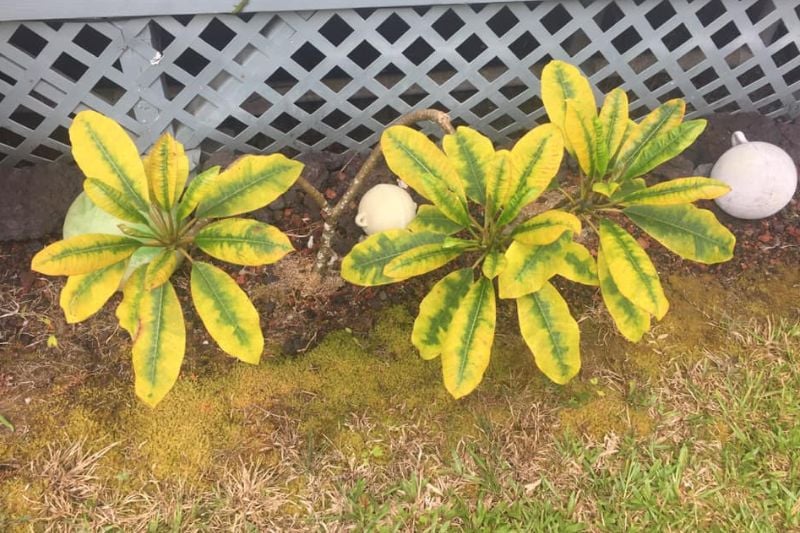
Are you noticing your beloved Plumeria looking a little lackluster? It may be a Nitrogen, Iron or magnesium deficiency.
These nutrients play a significant role in the growth and health of your Plumeria, so a lack can cause the leaves to lose their vibrant color and eventually affect the whole plant.
But don’t worry; most of the time, a little fertilizer in the spring and summer will do the trick.
Now, I know what you’re thinking, “But what about during the winter months? My Plumeria is in dormant mode and taking a little nap.” That’s okay! It’s best to let your plumeria rest during the winter and not fertilize them.
However, if you suspect nutrient deficiency and you’ve ruled out other causes, you can give your Plumeria a little boost with some fertilizer.
The slow-release pellets are a great option if you want to give your plant a more extended rest, but if you’re using liquid fertilizers, follow the dosage instructions on the package to the letter.
| Nutrient Deficiency | Symptoms |
| Nitrogen | Yellowing of leaves, poor growth, earlier maturation of the fruit, and lower yields. |
| Potassium | Yellowing of leaves begins at the tips of older leaves and spreads to the leaf margins. The area then turns brown and dies. |
| Magnesium | Yellowing of old leaves from the margins to the veins. |
| Zinc | Yellowing progresses from the new leaves to the middle leaves, yellowing the intervein spaces with distinct stripes. |
| Boron | Yellowing and then browning of leaf margins. |
| Iron | Yellowing begins on new leaves with green veins. |
| Copper | Tips of new leaves turn yellowish-white and wilt. |
And don’t even think about trying to make up for forgotten fertilizing during the winter. Trust me; it’s better to wait until spring when your Plumeria is up and ready to take on the world.
5- Solving Yellowing Leaves in Plumeria Due to Overfertilization
As much as you love giving our Plumeria the best care, it’s important to remember that too much of a good thing can be harmful.
For example, overfertilization can lead to leaf problems and root damage due to highly soluble salts in the soil. But don’t worry; following simple tips can keep your Plumeria healthy and happy.
First, avoid using slow-release fertilizer in combination with soluble fertilizer. This can lead to a buildup of salts in the soil and cause damage to your plant’s roots.
Instead, try using a water and fertilizer integration technology (WFIT) that combines fertilizer with watering the plant.
Second, ensure you’re providing the right amount of moisture for your plant. Over-fertilizing can lead to dryness and wilting, so be sure to keep an eye on the moisture levels in your soil.
Third, remember that fertilizer is only a “side dish” for your plant. The “staple foods” for houseplants are light, water, and CO2 (carbon dioxide) for photosynthesis.
Therefore, fertilizers are effective only when the staple foods are adequately prepared, and fertilizers are applied as side dishes.
So, by following these tips, you’ll be able to give your Plumeria the best care and avoid overfertilization.
6- Pests Causing Yellowing of Plumeria Leaves
As much as you love these beautiful blooms, you must admit that they can be a bit of a magnet for insect pests. The most common pests of plumeria are:
- Spider Mites
- Whiteflies
- Thrips
- Scale
- Mealybugs
But don’t worry; you can keep these pesky critters at bay with a bit of know-how and some quick action.
Spider mites
One of the main offenders of plumeria pests is the spider mite. These little buggers are persistent and can be found in almost any collection.
They can be especially pesky in the winter when central heating dries out the air. But don’t let them get the best of you!
Instead, keep an eye out for telltale signs of infestation, like discolored or yellow leaves, powdery dust on the back of the leaves, and even visible spider webs.
But don’t despair! You can beat the spider mite. The key is to act fast. First, take all infested plants into the bathroom and give them a good drenching with clean water.
This will help remove some mites and wash away any evidence of their activity. Then, leave the plants in the bathroom overnight. The increased humidity will be the final nail in the spider mite’s coffin.
Mealybugs
You might not recognize these critters immediately if you’ve never encountered them. White lumps or a white coating on leaves may seem benign at first glance.
But these sneaky pests can wreak havoc by feasting on the plant’s sap, often causing yellowing and wilting before you even realize they’re there.
But don’t worry; mealybugs are not as challenging as some other pests. If you’ve got an enormous infestation, start washing your plants with a soapy solution and manually removing the pests.
And don’t forget to check the soil – some mealybugs like to lay their eggs there.
Once you’ve cleaned up as much as possible by hand, it’s time to bring in the big guns. Use a cotton ball soaked in 70% rubbing alcohol to remove any remaining mealybugs. The alcohol will help break down their delicate skins and kill them.
If you’re still seeing some infestation, you can spray with a systematic insecticide or neem oil weekly until they are gone.
So don’t let those pests ruin your plumeria love affair. You can keep our blooms beautiful and bug-free with some know-how and elbow grease.
7- Anthracnose Disease Causes Yellow Leaves
I want to talk about a fungal disease called anthracnose that can affect not only plumerias but also grasses, vines, and berry fruits.
This fungal infection can manifest as dark red to black spots on the leaves and is often caused by overhead watering of the plant or by downpours on warm summer days when the plant is unprotected outdoors.
Now, if you see these dark red to black spots on your plumerias, don’t panic! The first thing you should do is stop watering the leaves and avoid spraying the plant.
Then, get rid of the infected leaves and plant parts. And finally, treat the plant with fungicides containing copper oxychloride.
If left untreated, the leaves will turn yellowish to orange; eventually, all leaves will turn yellow, and the plant will die. But with some know-how and quick action, you can keep our plumerias beautiful and healthy.
8- Poor Ventilation
If you are still trying to figure out what’s going wrong? Don’t sweat it, but do check your ventilation.
You know sunlight and watering are the stars of the show when it comes to caring for your Plumeria, but let’s remember the understudy: good ventilation.
Why is it so important, you ask? Well, my green thumb friends, good ventilation helps promote plant respiration and photosynthesis, which leads to healthy and robust growth.
But, if you’re neglecting your plant’s airflow, you might see some wrinkled leaves and yellow discoloration.
So, if you’re growing your plants in an airtight environment like an apartment, ensure ventilation in mind.
And hey, why not give them a little fresh air break by taking them out to a window or balcony now and then?
9- Understanding and Preventing Yellowing Due to Leaf Scorch in Plumeria

If your plumeria leaves look a little yellow and discolored? It could be a leaf scorch! When those beautiful leaves get too much sun, the plant tissue dies.
It’s most common during the summer when the sun is at its strongest, but it can also happen if you suddenly move your indoor Plumeria outside. The leaves just aren’t used to that kind of intense light yet.
But don’t worry; there’s a solution! First, gradually acclimate your Plumeria to the sunlight by exposing them to it for short periods before leaving them out for longer.
This way, they can adjust and thrive in the sun rather than becoming scorched. It’s like getting a tan; start with a shorter time in the sun before building up to more extended periods.
10- Natural Aging of Leaves

If a few of the lower leaves on your beloved plant turn yellow, don’t worry. It’s not a sign of impending doom, and your Plumeria is not a baby anymore. They grow up so fast, don’t they?
It’s normal for a few lower leaves to turn yellow as the plant ages. But, as long as the plant produces new leaves and fresh shoots, it’s nothing to worry about.
It’s like when your teenager starts cleaning their room; they’re just getting rid of the old to make room for the new.
And speaking of cleaning out, it’s common for plants to tidy up a bit in the winter. But, just like how we might declutter or organize during the colder months, your Plumeria may drop a few leaves.
So don’t worry if your plant looks weird; it’s a natural process. Your Plumeria is growing and becoming the beautiful, mature plant it’s meant to be.
Should You Remove Yellow Leaves?
The short answer is yes, you should remove yellow leaves. Yellow leaves can be a sign of various problems, and if left on the plant, they can drain energy from the rest of the plant, preventing it from thriving.
You can simply pick them off by hand or cut them off with sanitized scissors to remove yellow leaves. Using sanitized scissors is important to prevent the spreading any potential disease or pests.
Unfortunately, they will not revert to green once the leaves turn yellow.
Removing yellow leaves is a simple and effective way to keep your plant healthy and promote new growth.
Removing yellow leaves allows the plant to focus its energy on healthy leaves and encourage new growth. So don’t hesitate to snip off those yellow leaves and give your plant the best chance to thrive.


