Spider plants can grow long wiry stems to generate new pups. However, the spiderettes will stay on the stem until they’re fully grown, so you might want to let the branch keep growing — harvest the pups when mature for transplanting. Excess high-nitrogen fertilizer and low-light conditions can also cause stem elongation.

Contents
Why Is My Spider Plant Growing Long Stem?
[1] Spider Plant Growing Long Wiry Stems to Produce New Pups
The natural reproduction life cycle of spider plants is the primary reason for their long stems.
When the growing conditions are ideal in the spring or late summer, it produces long, wiry stems with nodes from which new pups (spiderettes) emerge. It’s the plant’s way of ensuring the species’ survival.
These spiderettes will remain on the spider plant stems until they reach maturity.
The roots will emerge much later, usually in late spring or early summer, and the pups will be ready to anchor to the ground.
Once the roots are 1-2 inches long, use a sharp, sterile pair of pruners or scissors to separate the pups from the stems gently.
Make sure that the roots are not damaged. To add to your spider plant collection, transplant your new babies into small containers.
[2] Spider Plant Grows Long Stems to Reach Out for Light
Insufficient light is the second most common cause of elongated spider plant stems. Remember that spider plants are only found in sunny areas of Central and Southern Africa.
On the other hand, Spider plants do not mind being exposed to artificial light. They thrive in bright, indirect sunlight, preferably in the south or west.
However, if you expose your succulent to shaded, dark, or low-light conditions for an extended period, it will develop long stems that grow toward the natural light source. It’s as if your plant is reaching for a bright window where it will receive adequate light.
It’s typical of a spider plant growing in search of light. I recommend rotating your plant regularly to ensure uniform light exposure.
Other Signs of Insufficient Light
Elongated stems are just one telltale sign of a light deficiency in a spider plant. Other signs and symptoms include:
- Variegated varieties, such as Chlorophytum comosum’ Variegatum,’ will lose their lovely cream-white striping in favor of a solid green color. Spider plants use this natural strategy to maximize photosynthesis.
- In low light, the leaves may turn pale yellow.
- The soil may dry out more slowly than usual.
- Growth is slowed, and new leaves may appear smaller.
- The leaf is drooping.
The easiest solution is to move your beloved spider plant to a brighter spot. But first, ensure it gets plenty of bright, filtered sunlight (at least six hours).
[3] Excessive Application of High-Nitrogen Fertilizer Encourages Spider Plant to Grow Long Stems
Spider plants are designed to thrive and reproduce in low to moderate-fertility environments native to central and southern Africa.
Therefore, even essential nutrients such as nitrogen and phosphorus must be consumed in moderation.
Feeding your plant too frequently or at a high nitrogen concentration will encourage aggressive leaf growth at the expense of other parts. It will make the stems grow longer to accommodate more foliage and pups.
Other signs include:
- Thin, slim, and tall growth.
- Browning leaf tips and edges.
- Reduced spiderettes formation.
- Your spider plant becomes more susceptible to pests.
Here’s What to Do When the Spider Plant Grows Long Stem

– Let the Stem Keep Growing
As a result of its vigorous growth and ability to reproduce, a healthy spider plant will develop larger stems on which to set new plants (pups). Your plant is doing well because it has long, sturdy stems.
So, why bother your valuable plant when it’s flourishing? Let it be so that the stems can grow and produce spiderettes for your future propagation efforts.
That doesn’t mean you should ignore your spider plant. Instead, carry on with the excellent care you’ve been providing it with, including lots of bright, filtered light, slightly damp soil, and a warm, humid environment.
Small plantlets will appear on the long, wiry stems you see. Depending on what comes next and the variety, it could take weeks or even months.
– Put the Plant Somewhere Bright and Sunny
If a spider plant doesn’t get enough light, its stems will grow in the direction of natural light. So place your spider plant in a bright, sunny spot to stop this from happening.
- Limit direct sunlight exposure – Avoid putting your plant in direct sunlight if possible. Moving your plant abruptly to a bright, hot windowsill or outside is even more stressful. The leaves will droop, and the plant will look terrible in the scorching sunlight.
- Best spot for light – Instead, put it within walking distance of a south, west, or east-facing window for maximum sunlight and brightness. The use of curtains or drapes can help block out harsh daylight. This setup allows your spider plant to bask in bright, indirect light.
- Limit deep shade exposure – I recommend limiting spider plant exposure to deep shade to no more than two hours per day as a general rule. You should provide at least 6-8 hours of bright light daily.
Side Note: However, if you want to promote the growth of plantlets and stolons, you should do the opposite. For three weeks, ensure the parent plant has long, uninterrupted nights and less than 12 hours of daylight.
– Reduce the Use of Nitrogen-Based fertilizers
Spider plants thrive in a low-fertility growing medium. Therefore, it is susceptible to high-nitrogen fertilizers.
Nitrogen fertilization causes vigorous growth of foliage and stems lengthening. Furthermore, because of the excess nutrients from the nitrogen-based fertilizer, your spider plant will consider producing plantlets.
This type of fertilizer should be used sparingly. If you notice long stems, stop feeding your spider plant for a while.
When nutrients are scarce, your plant will be forced to conserve them rather than develop new growth and spiderettes.
The effect of this technique may not be immediate. You’ll have to be patient, but the desired result will be realized eventually.
– Remove the Stem
Spider plants’ long stems can sometimes make them slim, leggy, and unsightly. As a result, it can significantly reduce your plant’s ornamental properties, especially if it’s part of a houseplant collection.
Consider removing the stems to improve the appearance and health of your health. Here’s how it’s done:
- Prune the stems that are incredibly long and brittle. Snip each long, wiry stem at the plant’s base.
- Of course, you must use a sterile pair of sharp scissors or pruning shears — needle nose pruners (Amazon link) are an excellent investment.
- After each cut, clean and sanitize the pruning equipment with 70% isopropyl alcohol or a 10% bleach solution.
- Cutting off the elongated stems will improve the appearance of your plant and prevent you from losing sleep over them.
When your spider plant reaches the mature stage of its lifecycle, it will begin to produce these long runners regularly.
Some can grow to be 2 feet long. Therefore, you should be prepared to prune them frequently.
Divide Your Spider Plant to Prevent Further Stems from Growing
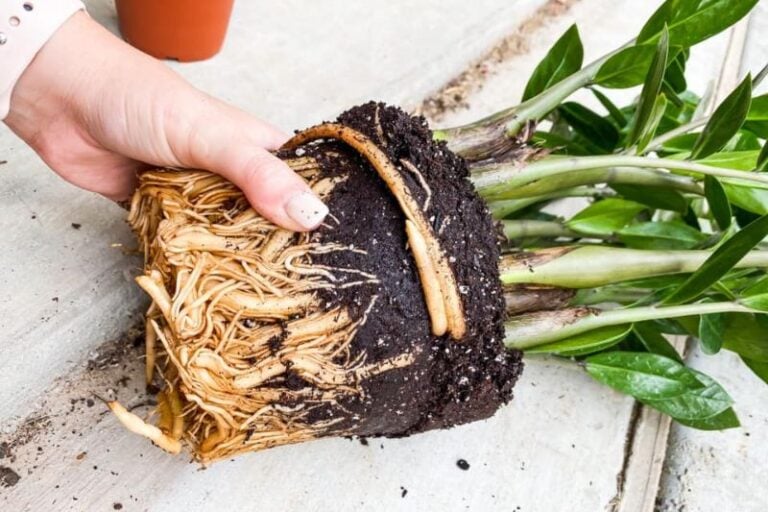
Meanwhile, dig up and divide your mature spider plant into large sections.
Gently pull apart the root ball into near-equal divisions, ensuring the majority of the roots are intact. The divisions can then be repotted in small to medium-sized containers.
– Remove the Spiderettes
Meanwhile, dig up and divide your mature spider plant into large sections.
Gently pull apart the root ball into near-equal divisions, ensuring the majority of the roots are intact. The divisions can then be repotted in small to medium-sized containers.
How to Propagate New Spider Plant Babies

It is so simple to propagate a spider plant that even your brown-thumbed friend can do it. It’s also an excellent way to repurpose spiderettes.
Depending on whether the spiderettes have rotted, the procedure may differ.
Method #1 – If the Spiderettes Have Developed Roots
- Gather What You’ll Need – You don’t need much to do. You may need the following:
- A sanitized pair of shears, scissors, or snippers (a sharp knife can suffice).
- Isopropyl alcohol for cleaning the cutting equipment.
- Soilless seed starting mix.
- Strelizied clay or terracotta pots.
- Dibbler or pencil.
- Get your Spiderette Cuttings: Find new babies with roots at least 1-2 inches long. They are ideal for propagation. Using your sanitized cutting tool, carefully snip the spiderettes off the stolon. Make sure that the roots are not damaged. This is accomplished by trimming along the base of the stolon.
- Fill the Pots with Potting Mix – I prefer to fill the containers with soilless seed starting mix (Check the latest price on Amazon here). It’s easy to eliminate potential diseases and pests.
- Prepare the Planting Holes – Use a sterile dibbler or pencil to create a shallow hole in the potting mix. It should be wide enough and deep enough to house the bottom & roots of the spiderettes.
- Plant your Spiderettes – Although optional, you can dip the lower side of the spiderettes into a rooting hormone. Plant the spiderettes as deep as their roots, then cover them with the potting mix. Moisten the potting medium but don’t soak.
- Proper Care – The most important thing to remember is to position your newly-potted spiderettes in a warm location that receives bright, indirect sunlight.
Method #2 – Propagating Spiderettes without Developed Roots
Don’t be alarmed if the spiderettes have few or no roots. Before cutting the spiderettes from the mother plant, use the stolon method to root them.
This method is very similar to what would happen in nature to a spider plant. First, it would send out runners that the soil would cover.
Then, the pup would grow roots, and the stem would break off over time, allowing spider plants to reproduce asexually.

To root and propagate your non-rooted spiderettes, follow these simple steps:
- Fill the Separate Pots with Potting Mix – You can use regular potting soil, but I prefer a soilless seed starter. Make a hole as deep as the spiderettes’ bottoms with a dibbler or pencil.
- Root the Spiderettes – Place the pots near the parent plant and put the spiderettes into the holes you created in the soil.
- Keep Potting Mix Moist – Your main concern is to maintain mix moisture since the parent spider plant will still be nurturing the spiderettes
- Cut Off from the Parent Plant – Remove the spiderettes from the mother plant once they have fully rotted. Continue to grow them in their new pots.
You can also use water propagation to root your spiderettes or cuttings. Again, filtered room-temperature water free of chlorine, fluorides, and other harsh chemicals are required.
Once your spiderettes have rotted, you must replant them in a soil-based container.
How to Make Spider Plant Bushy
- Light pruning – If you want to make your plant bushier and healthier, you should lightly prune it. Remove any browning or dead foliage that appears. Remove the pup shoots if it becomes too sparse and leggy to focus energy on the main plant.
- Keep it in a sunny location – Aside from light pruning, place your spider plant in a bright spot. Make sure it receives plenty of bright, diffused sunlight.
- Keep your plant at the proper temperatures – Spider plants grow best in the temp range of 70-90°F (21-32°C). Don’t expose your plant to drafts or temp below 45°F (7°C).


