Powdery mildew pest attack is the most common cause of aloe vera plants turning white. It may also occur due to excessive or lack of light exposure.
Furthermore, sudden temperature changes or a lack of nitrogen can cause aloe vera to appear pale. Apply a nitrogen-based fertilizer, keep your aloe vera in partial shade, and water when the topsoil feels dry.
It may appear that your trusted aloe friend is coming to an end. But don’t worry! There are several causes of plant discoloration, and you can easily nurse your aloe back to health.
Contents
1. Too Much Sun or Sudden Changes in Sun Exposure
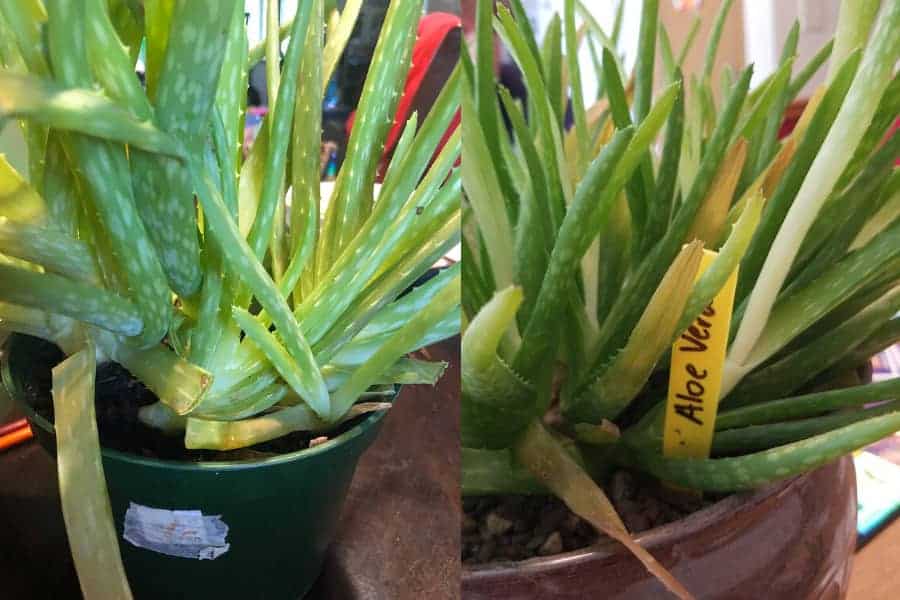
If you’ve noticed pale, almost white patches on your aloe plant, then, believe it or not, your desert plant might be suffering from a sunburn!
If your aloe is in a scorching environment (think the Arizona desert in the middle of summer), it probably won’t be able to handle full sun all day.
This is especially true for potted plants because they have shallower root systems than plants growing directly in the ground.
If you’ve placed your aloe pot in full sun, or you’ve moved it from your house to the outdoors, it’s possible for it to get sunburned.
This will make your aloe look like pale, almost white patches on the leaves.
On top of this, if you suddenly move them into hotter and sunnier conditions without an adjustment period, they can easily get fried from the sun and heat.
How to Fix
Limit Sun Exposure: If your aloe plant is in a pot and usually in direct sunlight, it might get too much heat and sun.
Move it to a place where it can have partial shade throughout the day, or move it indoors, where it can still get sun but sit in cooler temperatures.
For indoor aloes placed in front of a window, ensure they’re not sitting directly on the windowsill of South- and West-facing windows. Back them up or move them to more indirect sun exposure, so they don’t get too hot.
Transition Period: If you’re moving your aloe into a hotter and sunnier position from a cooler, shadier one, do so gradually.
Your aloe will need an adjustment period of a few days. So, start with a shady spot and gradually transition into their final, sunny spot. This way, they won’t get sun shocked!
2. Not Enough Sun
Being a desert plant, aloe needs a lot of bright, natural light to thrive. If your plant is stuck indoors, far away from a window, or positioned in a shady corner of your yard, you may notice the leaves weakening and growing paler.
This may be why your aloe leaves appear whiteish. This is called etiolation, which occurs when a plant cannot grow in enough sunlight.
How to Fix
Change Locations: Move your aloe plant to a sunnier location. If it’s indoors, you can set it directly in a North- or East-facing window or near, but not directly in, a South- or West-facing window.
Choose an area that gets partial shade throughout the day. If the temperatures where you live are a little more temperate, you might be able to put your aloe in full sun.
3. Inappropriate Temperatures or Sudden Changes in Temperature
Just like sudden changes in sun exposure can shock your plant, so can sudden temperature changes. Leaves can dry out and turn brown or pale if they experience sudden cold or heat.
How to Fix
You should never expose your aloe to temperatures under 50°F (10°C). If your aloe plant is inside, you won’t have to worry about this.
Monitor Outside Temperature: If you live in an area with regular-season changes, move your aloe plant inside when the weather becomes cold and wet. Remember, do this gradually over a few days.
When moving them back outside for the summer, make sure to give them a transition period.
If your aloe is planted outside in the ground and can’t be moved around, insulate it with blankets when the temperatures are cooler, especially at night.
Avoid Hot Windows: placing an aloe plant directly against a South-or-West-facing window can lead to it getting too hot.
Move your aloes to a North- or West-facing window, or, if they must face South or West, back them up a bit from the windowpane- about a foot of space will do.
4. Overwatering
As succulents, aloe plants don’t require much water. And if they get too much, it can cause problems for them.
There are two ways an aloe plant can become exposed to too much water: if you water too much or too frequently and have soil that doesn’t properly drain.
It’s possible to have both problems at the same time. If you notice your aloe plant developing large, light-colored soft spots squishy to the touch, you most likely have an overwatering problem.
How to Fix
Let It Dry: Luckily, this is an easy problem to solve. If your aloe plant is overwatered, remove it from the pot to let it dry.
Don’t leave it in direct sunlight while you do this, or you could risk frying the exposed roots. While it’s drying, remove any leaves that appear to be dead or close to it.
Check Drainage Holes: Make sure that your aloe pot soil drains properly: if you have it in a pot that lacks drainage holes at the bottom, you’ll need to move it to a pot that does.
Pots that are too deep can also drown your aloe because the water sticks around for a lot longer than it would in a shallow pot, allowing the aloe roots to continue sucking up water.
Check Your Watering Habits: You must look at your watering habits. Aloe doesn’t need watering every day or even every other day.
You should allow the top inch of soil to dry completely before watering again.
For most people, this adds up to watering about once every other week, but you’ll find the best intervals for your environment just by monitoring that top layer of soil.
5. Fertilizer or Salt Buildup
Over time or with heavy use, fertilizer and salt can build up on your aloe plant around the soil line and cause leaf discoloration or wilting.
In addition, some of the whiteness you might be seeing on your aloe plant is due to root damage due to intense fertilizer application.
Lack of nitrogen means there will be less chlorophyll and your aloe will show yellowing or turn white.
How to Fix
Remove Mineral Crust: First, remove the salt or fertilizer crust from your aloe plant. Lightly scratching at the build-up with your fingernail should do the trick.
Flush Out Extra Fertilizer: After removing the crust, you’ll need to leach the excess nutrients and salt from the soil.
To do this, pour about twice the volume of the pot’s worth of water on top of the potting soil.
Let it drain out through the bottom, taking the extra minerals. Make sure to let the soil thoroughly dry before watering again and re-fertilizing. So that you don’t cause overwatering damage to your aloe plant.
Don’t Go Overboard with Fertilizer: Aloe plants do not need much fertilizer. You can apply light fertilizer once a month, beginning in the spring and stopping when fall hits.
Aloe planted directly in the ground will only need fertilizing once in the Spring. Any more than this, and the minerals can start building up.
Use Pure Water: Use mineral-free water to water your aloe plant. Water from the tap typically has chlorine and other additives.
But depending on the brand, it might filter out enough minerals if you use an external water filter (such as a filtered pitcher or a filter attached to your water spout).
If you don’t have a filter, you can collect rainwater to water your aloe or leave a pitcher of tap water sitting out for a day before you use it to water.
This will allow some chemicals, like chlorine, to evaporate, and the remaining minerals settle on the bottom.
Refrain from pouring the last couple of inches of water on your plants; instead, pour that down the drain.
You May Also Enjoy: How to Save Overwatered Aloe Plant (Step-by-Step Instructions)
6. Not Enough Nutrients
Aloe vera is a naturally hardy plant known for its ability to grow in poor soil conditions.
That being said, it is still possible to deprive your aloe of enough nutrients, which may result in weak or pale-looking leaves.
Lack of nutrients does not allow aloe to make chlorophyll. Nutrients like nitrogen and magnesium are vital for this process.
If there is an insufficient nutrient supply, your aloe may turn white.
How to Fix
Choose the Right Soil & Fertilizer: Plant your aloe in soil specifically for succulents.
Between March and August, you should apply fertilizer once per month for potted aloes or just once in the spring for aloes planted directly in the ground.
Most gardening pros recommend a liquid 10-40-10 mix or a mix specifically made for succulents. This will give your aloe a boost without overwhelming it.
7. Excess Fertilizer Application
You’re much more likely to come across this problem than its counterpart. Because aloe root systems are designed to absorb water quickly, they can easily overdose on fertilizer.
An aloe turning red or white can be caused by the shock from over-fertilizing.
How to Fix
Flush Existing Minerals From Soil: If your aloe is already overloaded with fertilizer, follow the same directions as in the fertilizer/salt build-up section: leach the minerals out of the soil by draining water- about twice the volume of the pot- through the soil, and allowing your soil to dry thoroughly before re-watering or reapplying fertilizer.
Fertilize Sparingly: To prevent overload from happening, only apply fertilizer once a month between March and August for potted aloes or once in the spring for aloes planted in the ground.
Use a liquid fertilizer mix or one made especially for succulents, and try not to get it on the plant itself.
Thoroughly soak your aloe soil and allow it to dry for 12 hours before fertilizing.
This will let the roots absorb a thin coating of water that will help protect them from the shock of rapid and direct fertilizer uptake.
8. Wrong Soil Type
If you’ve tried everything else and are still noticing problems with your aloe, the culprit might be the soil your aloe is potted in.
Aloes are tropical or subtropical succulents (depending on the breed), and therefore don’t do well in typical potting soil.
For instance, you can’t use the same soil for your aloe for your pansies or daylilies, as it usually holds onto too much moisture and/or has too many nutrients. Both of these factors can cause the whitening of aloe leaves.
How to Fix
Get a Cactus or Succulent Mix: Select a specifically tailored soil for cacti or succulents.
This soil is aerated, which allows water to drain quickly and properly and prevents your aloe from drowning. It won’t be overloaded with nutrients, either.
Prepare Your Aloe for Repotting: Make sure your aloe is thoroughly watered 2-4 days before repotting.
Remove it gently, be sure not to tear the roots from the plant, and repot it in the new soil, barely covering the rootball.
If the rootball is too far down into the soil, the roots will not be able to breathe as well.
Thoroughly water your aloe once it is repotted to help the roots establish themselves in the soil.
Your plant may experience some shock from the repotting and show some discoloration for a short period.
Keep tending to the aloe as normal, which should go away within a couple of weeks.
Hopefully, after reading this guide, you won’t feel so much like a bewildered parent trying to understand their moody teenager!


