Have you ever felt like you just killed your beloved houseplant after giving it a much-needed upgrade with a fresh new pot? Don’t worry; you’re not alone. I’ve been there too.
But here’s the deal – sometimes our green babies just need a little extra love and care after a repotting. And let’s be real, who wants a sad and lifeless plant in their living room?
So, let me share with you some tips I’ve learned on repot your plants without giving them a ‘plant-tastrophe.’
You see, sometimes we get too excited about giving our plants a new home and forget to give them the proper care they need after the move. But don’t worry; we’re going to change that.
I’ve covered everything from timing to preparation to the actual repotting process.
Trust me, with these tips; you’ll have your plants thriving in no time! So sit back, grab a pot of soil, and get to repotting the right way.
Contents
Why Do Plants Sometimes Die After Repotting? Let’s Find Out!

Have you ever felt like you just gave your houseplant a one-way ticket to plant heaven after a repotting session? Don’t worry; I’ve got some insider information to help you avoid that fate.
Wrong Repotting Techniques:
When you give your plants a new home, they may initially feel a little overwhelmed. But with the right repotting method, they should bounce back in no time.
That is, within a week or so. You may have made a misstep during the process if they don’t. Like us, roots can be very sensitive, and if they’re not handled carefully, they can lead to their untimely demise.
Clogged Roots:
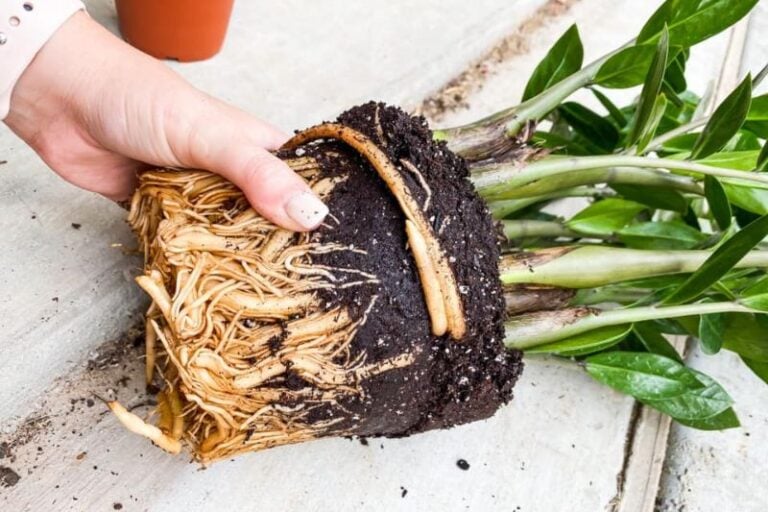
If your plant’s roots look like a big ball of spaghetti, it’s time to give them some room to breathe. Gently remove the soil, and loosen up the roots so they can soak up all the water and nutrients they need.
But be careful not to damage them! A little tender love and care go a long way in helping your plant recover.
Damaged Roots:
Ouch! Just like us, a plant with damaged roots will have a tough time adjusting to a new environment.
They may not be able to soak up enough water and nutrients, which can lead to their downfall. So handle those roots carefully, and ensure they’re in good shape before repot.
Wrong Time of the Year:
Different plants have different schedules, so it’s important to research and find the best time to give them a new home.
Repotting during the wrong season can stress your plant and lead to its untimely demise.
Plants that Don’t Like Being Repotted:
Let’s face it, moving is tough! Some plants just don’t like change and would rather stay put.
So before reaching for the potting soil, ensure your plant is up for the adventure.
Gaps Between Roots and Soil:
Roots must be in close contact with soil to soak up all the water and nutrients they need.
If there’s a gap, your plant will struggle to thrive and may not make it through the transition period. So when you repot, ensure the soil is snugly up against the roots.
Not Enough H2O:
After you’ve given your plant a new home, it’s important to give it plenty of water. The soil should be moist but not soggy.
And remember, a little extra TLC in the form of H2O can go a long way in helping your plant make a smooth transition.
Pot That’s Too Big or Too Small:
When it comes to repotting, size matters! You want to give your plant enough room to grow but not so much that it feels like drowning.
A pot one size larger than its previous home is usually just right. And remember, if the pot is too big, it’ll require more soil, leading to an overly humid environment that’s hard on your plant’s roots.
When to Repot Houseplants
Are you ready to give your houseplants a makeover? Great! Let’s talk about when’s the best time to repot them.
Typically, it’s recommended to replant your houseplants once every one to two years, but you know what they say – “Age ain’t nothing but a number.”
The growth rate of your houseplants can vary from species to species, so observe their condition and see if they’re telling you it’s time for a change.
Let’s not forget that most houseplants aren’t fans of the cold, so to minimize their stress levels; we suggest replanting during their growing season, which is from May to September.
This is when they thrive and soak up water like a boss.
So, don’t just rely on the calendar; keep an eye out for signs like leaf discoloration, root congestion, and how well they soak up water.

Moisture Is Not Readily Absorbed
If you’re finding waterlogged soil after watering your houseplants, it’s probably time to change.
Hardened and old soil can’t absorb water like it used to, and all those vital nutrients are gone. Give your plant a fresh start by replacing the soil with some new stuff, and watch it thrive!
Brown or Yellow Leaves
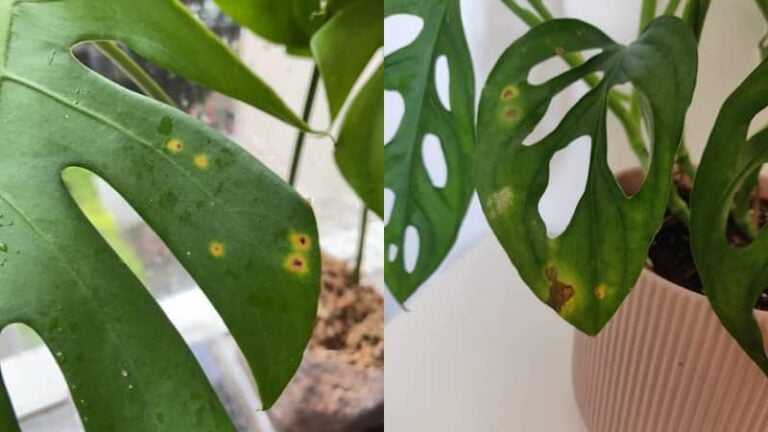
Yellow or brown leaves on a houseplant are like a red flag. It could mean the soil has run out of nutrients or the plant is getting too much sun.
Either way, if your green thumb is scratching its head, it might be time to switch pots and treat your plant to some fresh soil.
Roots Are Growing Out of The Bottom of The Pot
Roots coming out of the bottom of the pot are a sign that your houseplant has outgrown its home.
All those tangled roots can’t absorb all the nutrients they need, so it’s time to give them some breathing room. Just be gentle when handling those roots, and repot with care!
Get all the expert tips and tricks for successful repotting with my comprehensive blog post on repotting houseplants!
3 Proven Ways to Keep Your Plants Alive After Repotting

1- Repot at the Right Time
Start with the basics, and make sure you’re repotting your plants appropriately. Every plant is different, and timing is key.
Take roses, for example – the royalty of flowers. Repot them between January and February while they’re in dormancy to reduce stress on their roots.
And if you see the roots peeking out of the bottom of the pot at other times, don’t touch them! Just carefully transfer them to a new pot to avoid damaging those delicate roots.
On the other hand, houseplants like Pothos, Monstera, and Dracaena that can’t handle the cold should be repotted during the growing season, from spring to fall.
Because if they go dormant during the winter, they might not recover after repotting and saying goodbye to this world.
In short, know your plant’s schedule and make sure you’re repotting at the right time. No plant wants to be disturbed during its beauty sleep or siesta.
Research the repotting time for each plant and avoid repotting them to death. Trust us; it’s not worth it.
2- Give Your Plants a Boost with a Natural Growth Stimulant
Don’t mistake “Plant Growth Stimulant” for fertilizer; they’re two different things. Growth stimulants are like a vitamin shot for your plants, giving them vitality and making them lively and healthy.
Not only that, but they also act as root stimulants and help new roots grow and recover from repotting damage.
Using a growth stimulant is a breeze! Simply dilute it with water according to the instructions and give your repotted plants a good soaking.
You’ll see results in no time! Even wilted plants will perk up quickly.
And, if you give your plants a growth stimulant boost during the curing period, you’ll greatly reduce the chance of plant death.
I like to use this Natural Plant Growth Stimulant (link to Amazon).
Not just for repotting, growth stimulants can also help protect your plants from the summer heat, promote seed and cutting rooting, and even improve the taste of your veggies and fruits!
So, if you’re a gardening enthusiast, add a growth stimulant to your must-have list!
3- Give Your Plants a Break in the Shade
The most crucial step after repotting is to give your plants a break in the shade.
Repotting can be tough on plants, damaging their roots and leaving them in a weakened state.
Exposing them to direct sunlight during this time will put too much pressure on them to photosynthesize, causing them to wither and possibly die.
So, keep them in a shady, well-ventilated spot for a few days to give them a chance to recover.
After three to four days, most plants will be ready for the sun again.
But if you were a little heavy-handed during repotting, give the plant a week or so to adjust before exposing it to direct sunlight.
And, as always, gradually acclimate your plants to the sun, keeping a close eye on them.
Is Old Soil and Rain Bad News for Repotting?
Just-repotted plants are in a delicate state and need time to bounce back.
Giving them a week to cure after repotting is crucial, but too much rain can worsen things.
Old soil may have depleted nutrients, bacteria buildup, and remnants of old roots, so it’s best to mix it with fresh soil if you want to reuse it.
And don’t forget to remove any old roots before using old soil for repotting.
Morning or Evening: Which is Best for Repotting?
The answer depends on the plant and the season.
Winter is cooler after 3 PM, so repotting in the evening will allow the plant to adjust to the cold.
On the other hand, in the summer, the soil is warmer during the day, so it’s best to repot in the cooler evenings to prevent the roots from getting damaged by the heat and humidity.
If you can’t pick the perfect time, morning is a safe bet for repotting.
Don’t Let the Soil Dry Out After Repotting!
Houseplants need time to regain their strength after a repotting session.
Repotting can be tough on their roots, so give them some TLC.
Water your plant every 2-3 days for about two weeks.
After watering, give it a break in a semi-shady area, away from direct wind and sunlight.
To help your plant adjust to its new home, try to move it as little as possible.
Key Takeaways,
In conclusion, don’t let your plants wilt and die after repotting again! With these three simple tips, you’ll be able to keep your green babies healthy and happy.
- Repot at the perfect time for each plant.
- Give them a boost with a natural growth stimulant.
- Give them some downtime in the shade.
By following these steps, you’ll be on your way to growing a lush and thriving garden. So, go ahead and repot with confidence, and don’t forget to have a little fun while you’re at it!


