Repotting at the right time will make a difference in future growth. First, I’ll go over the fundamentals of repotting, such as when it’s best to do it, what equipment you’ll need, which soil is ideal, and which container to choose.
Contents
- When Is The Best Time To Repot Houseplants?
- When Is It Time To Move Houseplants To A New Pot?
- How to Repot Houseplants
- Start By Repotting Your Houseplants With Drainage In Mind
- Method for Repotting
- How to Get Ready for Repotting
- 1- Remove The Houseplants To Be Repotted From Their Pots
- 2- Place Stones in the Pot’s Bottom
- 3- Determine the Height
- 4- Set The Houseplants in Place And Fill Them With Soil
- 5- Continue To Water Until Clear Water Flows
- How to Care for Your Houseplants After Repotting
- Why Do You Need To Repot Houseplants?
- How To Choose A Pot For Your Houseplants
- How to Choose Soil for Houseplants
- Step Up! Making Your Own Soil
When Is The Best Time To Repot Houseplants?

The best time to repot houseplants is between May and September (approximate temperature: 68 °F). When grown indoors, tropical houseplants typically begin growth in April or May and enter their active growth period in June.
This is when they wake up from their dormant mode. This is when they start to grow new roots, so replanting them in fresh soil will help them grow.
However, avoid planting in mid-summer when the temperature exceeds 86 °F or during the rainy season. Instead, it is recommended to replant in the morning on a dry, sunny day.
It is recommended that you base your decision to replant on the “temperature” rather than the month or day, as temperatures vary depending on where you live.
You should not repot houseplants during winter. During the cold winters, they slow down their growth and go into a state of rest. If you repot them now, their roots will be resting as well.
Humidity Is Preferable When Repotting
It is best to keep houseplants dry after repotting them. I recommend a humid environment from June on, especially in the second half of June when temperatures are higher.
Try To Avoid Repotting In Midsummer
Midsummer is a slow time for indoor plants to grow. It’s best to put off repotting as long as possible. You should replant when the heat has died down.
When Is It Time To Move Houseplants To A New Pot?
If you need help determining when to repot your houseplants, these guidelines can help.
Repot Every Year Or Every Two Years In General
The timing of repotting is determined by the plants being grown and the growing conditions.
As a result, it is impossible to say, “When is the best time to do this? It is impossible to state, “When is the best time to do this?
Repotting general houseplants should be done once every year or every two years.
Ideally, Once A Year
Fertilizers added when replanting small houseplants and fertilizers included in houseplant soil lose their effectiveness after about a year.
So, annual repotting is recommended to monitor the condition of the roots.
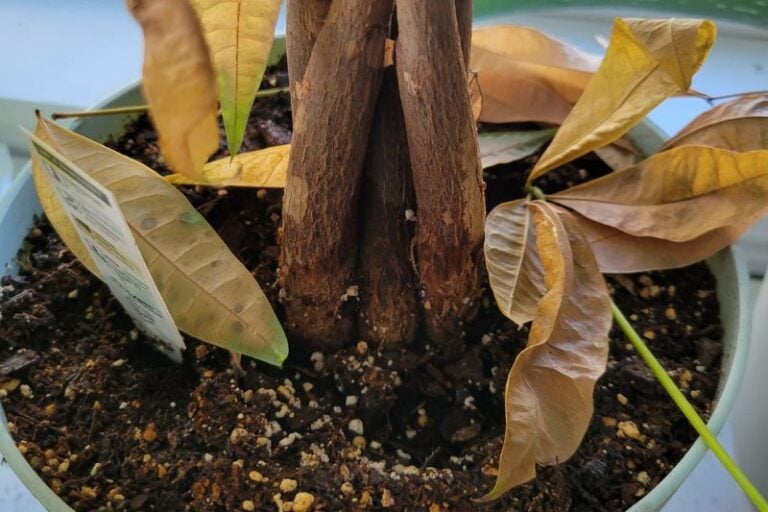
Roots Are Coming Up From The Bottom of The Pot

When a plant’s roots get stuck, they may grow from the bottom of the pot. Through the drainage holes, you can see the roots. This occurs because the roots are invading and occupying the container itself.
It’s easy to tell if a plant is in a plastic pot because the plastic expands when the roots get clogged, but it’s more challenging to know if the pot is made of ceramic or terra cotta.
Therefore, a possible criterion is whether or not the roots are escaping the bottom of the container.
How to Repot Houseplants
If this is your first time repotting, I have included a list of simple steps to help you along.
Start By Repotting Your Houseplants With Drainage In Mind
Overwatering leads to root rot, the leading cause of death for houseplants.
But most common houseplants can handle dry conditions, so you don’t need to overwater them.
The rule of thumb for watering is to water heavily once the top inch of soil has dried out. However, it can be tricky to gauge how dry your houseplants are if you aren’t used to caring for them.
It’s easier to take care of houseplants if you water them simultaneously every day instead of letting the plant tell you when to water them.
Method for Repotting
The only requirement for the repotting method I’m about to describe is that the plant is grown in a sunny, well-ventilated place.
If root rot happens, look at the plant’s growing conditions and where it is in the house.
How to Get Ready for Repotting

- Pot: Any pot with a hole in the bottom of the pot of your choice
- Soil: Soil specially designed for houseplants
- Potting stone: Pumice stone
- Others: Potting net to place at the bottom, disposable chopsticks (thin sticks)
- Useful: Soil shovel, newspaper, gardening sheets or trays, gloves, etc.
This time, I chose a general-purpose plastic pot. Choose a well-drained soil containing necessary micronutrients and beneficial microbes, such as Happy Frog Potting Soil. (Amazon link)
1- Remove The Houseplants To Be Repotted From Their Pots

I’ve decided to repot my Monstera this time. But first, take the plant out of its pot and break up the root ball (the part of the soil where the roots are growing).
Houseplants sold at home improvement or gardening stores may have old soil. Remove the old soil to avoid damaging the roots, and remove the blackened roots together.
If the soil is hard, you can easily remove it by dissolving the soil in water. The soil’s surface is often significantly degraded, so remove it cleanly.
You should be fine if the old soil is largely removed like this. If you are uncomfortable with it, gently rinse it with running water.
Some houseplants require you to keep the root ball intact when repotting. Check before repotting.

2- Place Stones in the Pot’s Bottom
First, lay down a potting bottom net and place a potting bottom stone on top of it. The bottom of the pot should cover the net. If you use a larger pot, you may need to add more stones to improve drainage.
The potting stone will improve drainage and keep soil from running off. Furthermore, if the plants are to be grown outdoors, this is a critical step to prevent pests from entering the pot.

If the bottom of the pot is made of mesh like this, it doesn’t matter if the pot bottom net isn’t in place.
3- Determine the Height
You can adjust height and position by placing the plant in the pot. By adding soil or removing a potting stone, ensure the earth’s surface is about a half inch below the edge of the pot.
The reason for not filling the pot to the very edge is to allow for water space (space to prevent water from overflowing when watering). It will also keep fertilizer from falling out when you place it.
4- Set The Houseplants in Place And Fill Them With Soil
After determining the height of the houseplant, surround it with soil. After adding soil with the water space shown in (3), poke the ground with disposable chopsticks.
This will close soil gaps and improve drainage. Do this thoroughly because it helps to prevent root rot. As a result, the soil will settle faster than you think.
It’s fine to add soil to compensate for the sunk amount and lightly poke it again.
5- Continue To Water Until Clear Water Flows
Finally, water the plant to complete the process. Brownish water will flow from the bottom when watering the pot immediately after repotting.
This is because of the presence of excessive dust (fine soil). The saucer will no longer be messy if you water it thoroughly here until the water becomes clear.
How to Care for Your Houseplants After Repotting

Houseplants are sensitive to water loss after repotting, so keep the soil moist for about two weeks.
After that, water the plants when the soil surface dries out, and you notice a change in the color of the soil surface.
However, if you are unsure, watering once every two to three days should suffice.
Also, avoid exposing it to direct sunlight. Instead, place the plant in partial shade and wait for the roots to form.It will be fine indoors if the light is about as bright as through a curtain.
Say goodbye to plant death after repotting and learn the secrets of saving your green babies with our guide on preventing plant death after repotting.
Why Do You Need To Repot Houseplants?
This part explains why houseplants need to be repotted. You will discover that repotting is an essential process for houseplants.
To Remove Waste That Has Accumulated in The Soil
Houseplants produce waste through their roots; if they are not repotted, the waste will accumulate in the soil. This waste can stunt the growth of houseplants.
If you water the plant enough that water flows out of the bottom of the pot, the waste will run off with the water, but you can’t get rid of it completely. Regularly repot the plant to keep it as clean as possible.
To Restore Depleted Soil
Over time, wastes from houseplants accumulate in the soil, and the soil itself deteriorates. As a result, the soil depletes nutrients and eventually cannot supply enough for the plants.
The deteriorated soil particles become finer, which can cause poor drainage, root rot, and other issues.
Getting Rid of Disease-Causing Germs
Old, deteriorated soil does not drain well, and bacteria and fungi cannot be washed away easily. This can result in the growth of disease-causing microbes.
Using well-draining soil and watering the pot so generously that the water flows out the bottom will wash away the germs in the soil and keep it clean.
To Get Rid of Pest Larvae And Eggs
You must not forget about pests. Some pests do bad things in the soil besides spider mites, aphids, and other pests that suck sap from leaves and stems.
The most common are root-feeding bugs (root cutters), such as the larvae of the boll weevil.
Root cutters are very annoying, and because they live in the ground, you might only notice them once the plants are already in bad shape.
You can treat them with wood vinegar or other solutions, but replanting the plant is simple and easy.
If areas are being eaten away, spray them with fungicides or other products before replanting to prevent disease infection.
To Avoid Root Clogging
A “root-bound” houseplant has roots that have spread to fill the pot to the brim.
When the roots are clogged, drainage is terrible, and the plant can’t get as much water as it needs. This makes the plant grow slowly and, in the worst cases, kills it.
If you see roots coming out of the holes in the bottom of the pot, the plant is probably clogged or will be soon. Repot the plant into a larger pot or rearrange the roots and repot it.
You can fix a root blockage by taking the plant out of the pot and replanting it in a larger pot or trimming the roots.
How To Choose A Pot For Your Houseplants
When repotting, pots are just as important as soil selection. But, of course, not just any pot will do. So here are some tips on choosing a pot to help your houseplants thrive!
Does It Have A Hole in The Bottom of The Pot?
The pot bottom hole is the most crucial consideration when choosing a pot.
You are more likely to choose a pot with a sizeable potting hole in the bottom if you are a beginner with houseplants.
The holes in the bottom of the pot allow for better aeration and drainage and root rot prevention.
To reduce mistakes when growing houseplants, use pots with smaller holes in the bottom of the pot or pots without holes in the bottom of the pot.
Growing houseplants typically grown hydroponically requires a unique pot with no drainage holes.
Selecting The Material of The Pot
Next to the pot bottom hole, the material is the most important. Different materials have different characteristics, so choosing one that suits your growing style is best.
Plastic Pots Are Lightweight And Come in A Variety of Designs
Plastic pots are characterized by their lightweight. The pot is lightweight compared to unglazed pots and other materials, making it easy to move and hang. Plastic pots come in a variety of styles as well.
Plastic pots are also difficult to break, even when dropped. In addition, you can match the characteristics of your plants by selecting pots that are vertical or have slits in them.
Recently, environmentally friendly plastic pots made of materials that return to the soil or can be disposed of as recyclable waste have become available.
The Versatile Unglazed Pot
Because they are easy to keep dry and moist, unglazed pots have good ventilation and drainage and can be used for all plants.
Mold may, every once in a while, grow on the surface. Therefore, it can be used as decoration. However, use caution when handling it because it will break if dropped or bumped.
Biodegradable Nonwoven Fabric that Returns to the Soil
Pots made of biodegradable non-woven fabrics that decompose when buried in soil are available. They have good ventilation and drainage, just like unglazed pots, and I recommend using them as pots outside.
It can also be used as a pot cover when used indoors. In addition, it is recommended for use in interior design.
How to Choose Soil for Houseplants
This is the foundation for growing houseplants, so choose carefully. Here are some tips for choosing houseplant soil according to the type of plant and the environment in which it will be grown.
For Indoor Growers
Many people grow houseplants indoors. When growing them indoors, we recommend soil that does not contain humus or peat moss, which can cause houseflies and other problems.
When buying commercial soil for houseplants, it is also advisable to look at the composition and choose soil composed of inorganic materials.
For Those Who Find Watering Troublesome (Hydroponics)
If you find it troublesome to water your houseplants, hydroponics is recommended, although the range of houseplants you can grow is smaller.
You can grow plants in bottles or pots with no holes by placing a hydro ball in the bottle or jar.
It is not recommended for beginners to hydroponically grow houseplants in soil, as they may rot.
Therefore, it is recommended that beginners purchase hydroponic houseplants sold at home improvement stores or gardening stores.
When growing hydroponically, change the water about once every week or two, rinsing the plant several times while it is still in the pot so that the inside is clean.
Keeping both the container and the water clean will reduce the growth of mold, bacteria, and other organisms.
What if I don’t want to use the soil all over again but still want to reuse it?
It is surprisingly troublesome to throw away soil, and although you would like to reuse it, it is not recommended to use soil that has been used once again.
This is because the soil itself may have degraded, or there may be pest eggs or disease-causing microbes.
If you want to reuse the hard soil, spread it out on a blue sheet and let it dry in the sun for 2 to 3 days to sterilize it.
If you want to reuse soft soil such as humus, dampen it, put it in a black plastic bag, and leave it in a sunny place for 2 to 3 days during the hot summer season. Then mix in soil amendments or other materials to restore the soil.
Step Up! Making Your Own Soil
Once you get the hang of it, mixing your soil is a lot of fun. If you want your houseplants to thrive in a particular environment, you should mix the soil to make it more like the soil that the plants evolved in.
Do not rush through growing plants while trying to analyze your growing habits and environment; instead, take your time and learn as much as you can along the way.