Last summer, I had this Aloe Vera plant that had been thriving and growing quite large. However, I faced a major setback with it…
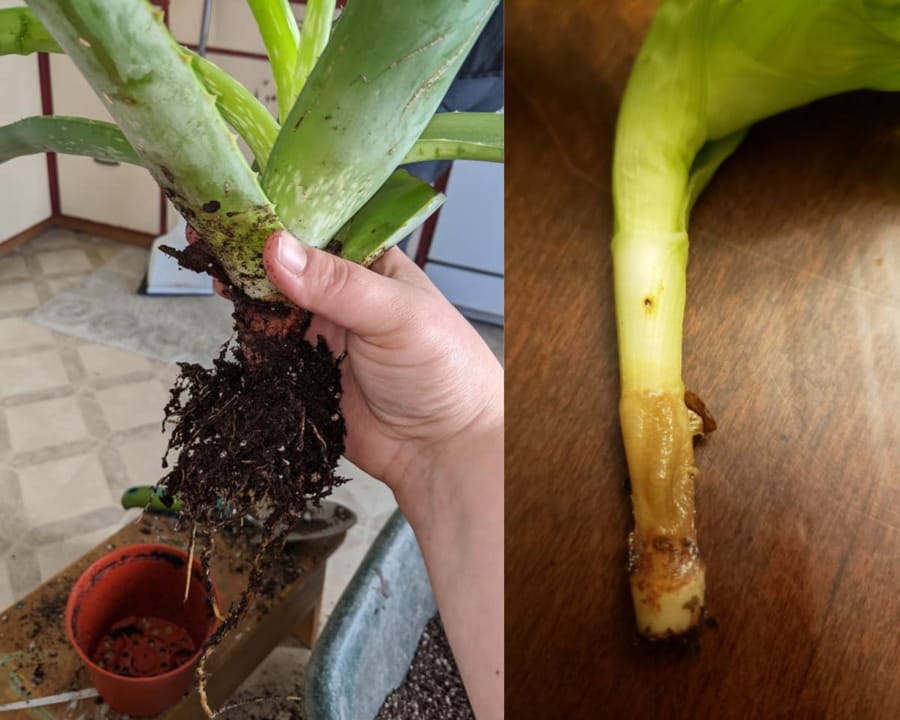
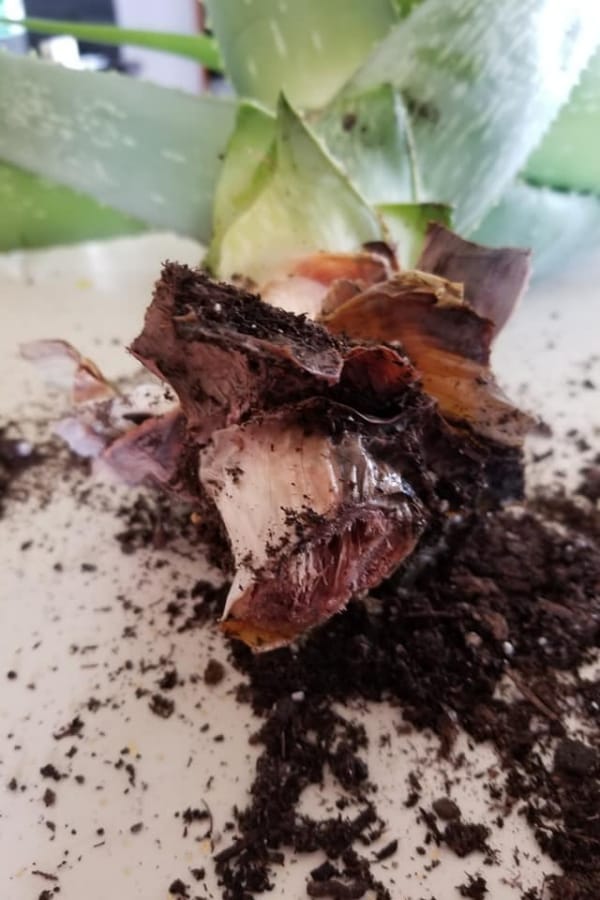
Sadly, the base of the stem, right down to the roots, got completely rotted. I realized that this happened because I was overwatering it.
I mean, Aloe Vera is a tough plant that can go months without water. I was watering it every three days – no wonder it suffered from root rot!
In addition, I learned that giving too much nutrition is harmful and the more you baby these plants, the higher the risk of killing them.
But then, I thought, maybe it’s not too late. I could still save it by regenerating its roots. So, I researched how to revive a rotting Aloe.
I found out that by carefully removing the rotted roots, letting it dry for about a week, and then replanting, it could possibly regenerate.
The only catch was that this method assumes the stem is still healthy, and I wasn’t sure if that was the case with mine since the rot had reached the stem.
Here’s how you can aloe vera from root rot:
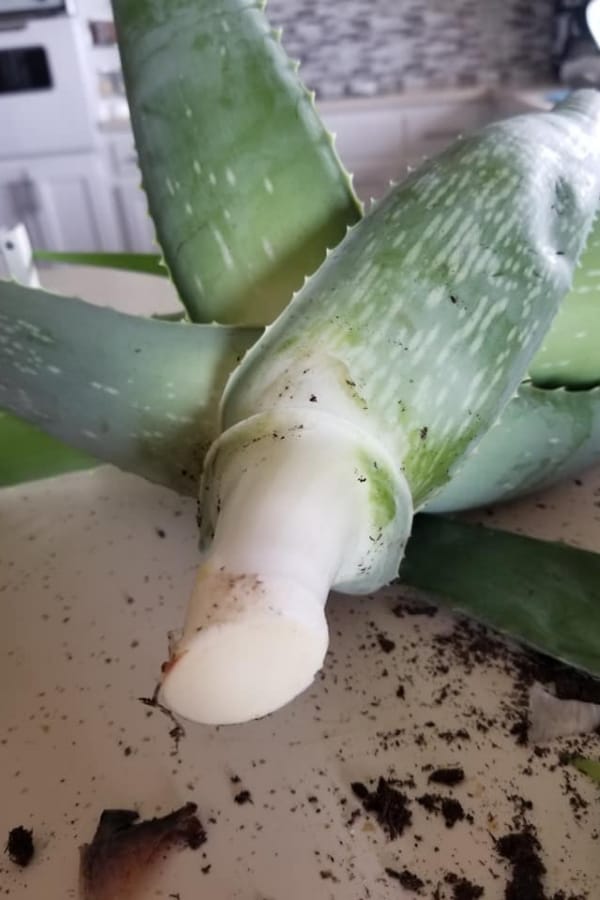
First, cut off the healthy part of the plant, above the rotten area. Then, using some string, hung it upside down to dry in the shade. This is crucial – the cut end needs to be completely dry before you proceed, which might take a few days to several weeks.
Once the cut end dried out and if you could see tiny roots emerging, the next step is simple. Just bury it in soil to grow. The key is patience – waiting until the roots start showing from the cut end is essential for successful regrowth.
After a week, I checked on my Aloe only to find the cut area turned brown and mushy, showing that the damage had progressed. Sadly, the plant couldn’t be revived this time. I regret not learning how to properly care for Aloe Vera before buying it. But I didn’t want this experience to go to waste.
Contents
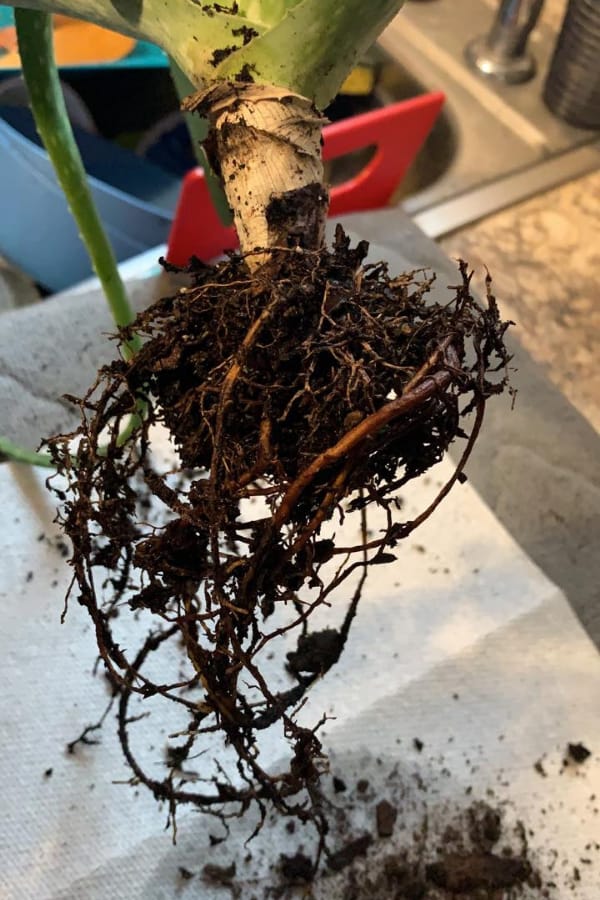
How to Identify Aloe Vera Root Rot
Healthy roots are white with many fine roots. If they’re mushy, watery, or crumble when touched, that’s a sign of root rot.
Root Rot vs. Healthy Aloe Vera Roots at a Glance
- Root Rot: Brown or black, mushy, emits a rotten smell.
- Healthy Roots: White or pale, firm, and strong, no bad smell.
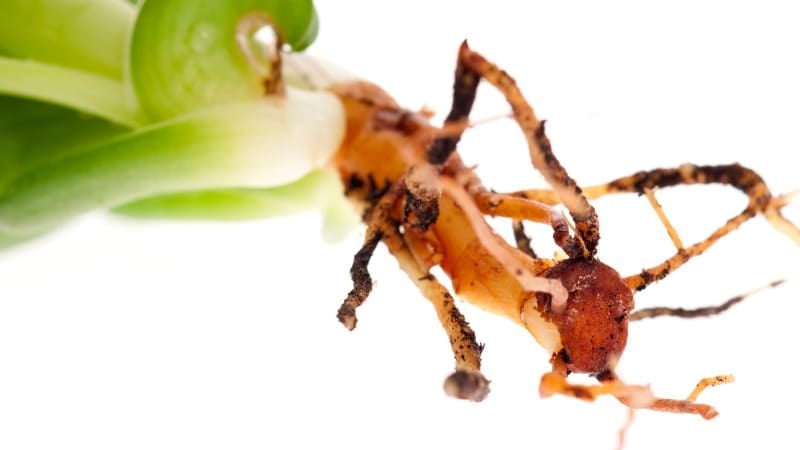
Root rot can be due to poor soil drainage or a fungal/bacterial disease. In disease cases, the roots might narrow or turn brown when cut.
Improve the environment for physiological root rot by replanting in well-draining soil. For disease-related root rot, avoid consistently wet soil and lack of sunlight.
Black, soft, water-soaked roots with a strong odor mean it’s time to act. Get in there and give your plant a sniff – it’s important!
And remember, don’t wait until it’s too late to save your plant. Fertilizers won’t help a rotting plant; it’s better to address the root issue (pun intended).
Saving Aloe Vera from Root Rot: Step by Step
1- Immediate Repotting
Caught root rot early in your aloe vera? Act fast! Take it out of the damp soil and repot it. Use fresh soil and a new pot to avoid old soil’s pests and diseases. Trust me, fresh soil makes a huge difference.
2- Choosing the Right Pot
The right pot is key. Look for one with large drainage holes. Aloe vera likes water, but not too much. The perfect pot should have enough space and good drainage to keep those roots dry.
3- Soil Mixture
Make your own aloe vera soil mix. Combine 3 parts potting soil, 2 parts small stones or pebbles, and 1 part perlite. Ensure stones are clean and fungus-free – sterilize them with boiling water if needed.
4- Careful Root Inspection
Remove the aloe from the pot and gently check the roots. Rinse them, then cut away any rotten parts with a clean, sharp knife. Let the aloe rest for a few days to dry out the roots before replanting.
5- Disinfecting Old Pots and Tools
Reusing pots? Clean and sterilize them first. Use boiling water and bleach, especially if the pot had root disease. I like to scrub them, then soak in a bleach solution, and dry for a few days before use.
Use clean, sharp tools for cutting. Disinfect them with rubbing alcohol or a bleach solution. I even heat the cutting edges with a lighter flame for extra sterilization. Remember, clean tools prevent disease spread.
6- Trimming Rot-Infected Roots
As long as the main stem is alive, it can be saved. Use clean garden scissors to carefully cut away the rotted, black or brown roots, keeping the healthy parts.
Next, dip the roots into a fungicide or potassium permanganate solution for a thorough disinfection. Then, hang the plant upside down to dry for a few days or weeks. Wait until the cut dries and roots show before replanting.
7- Repotting Your Aloe Vera
Use a new pot or clean the old one with soap and hot water. Make sure it has good drainage to prevent waterlogging.
Fill the pot with your soil mix and repot the aloe vera. Don’t water it immediately; give it a week or two to settle in its new home.
Keep the plant in a warm, shaded place and start with moderate watering. Use room-temperature water and adjust the frequency with the seasons – twice a month in warm seasons, once a month in colder ones.
How to Prevent Aloe Root Rot
1- Avoid Waterlogging
Control the moisture. Keep the soil loose and well-aerated. Remember, the drier the soil, the lower the risk of root rot.
2- Regular Watering Schedule
Water your aloe vera regularly, adjusting for the season and environment. To keep your plant healthy, water it when the top 1-2 inches of soil feels dry. Simply insert your finger up to the second knuckle to check the moisture level.
3- Right Location and Soil
Choose a spot with loose, well-drained soil. If the soil is heavy, mix in sand and compost for better drainage.
4- Strengthen Your Plant
Use plant boosters like diluted garlic tea to strengthen your aloe vera and protect it from diseases. It’s like a health tonic for your plant!


