Are you ready to give your Dracaena a new home? Well, hold on to your pruning shears because spring is the best time to repot your beloved plant.
Why spring, you ask? Because, at this time, growth processes are in full swing, including root regeneration. This means your Dracaena can recover more quickly from the stress of being transplanted. So, spring is the time to do it if you want to give your plant a fresh start and a new lease on life.
But what if you missed the spring window? Should you give up and wait until next year? Not so fast! While it’s not ideal, you can still repot your Dracaena in the summer.
However, remember that the healing process may be slower than it would be in the spring. So, hold off until the warmer months.
Now, let’s talk about the end of the growing season. As the temperatures start to cool and the days get shorter, growth processes slow down and eventually halt.
Any damage or stress to the plant will take a long time to heal. So, unless absolutely necessary, it’s best to hold off on repotting until spring. Trust me; your Dracaena will thank you.
Contents
How To Tell If Your Dracaena Needs Repotting

First things first, let’s talk about timing. If your Dracaena is young (up to five years old), it’s recommended to repot it yearly.
This is because young plants need more room for their roots to grow and expand. However, as your Dracaena grows older, it’s recommended to repot it every three years.
And for the average Dracaena, it’s recommended to give it a new “home” once every two years.
| Dracaena Age and Size | Repotting Time |
| Young (up to 5 years) | Annually |
| Large (6ft or taller) | Every 3 years |
| Average (2ft-6ft) | Every 2 years |
If your Dracaena is growing well and has enough space in its current pot, there’s no need to disturb it.
However, remember that even the most careful repotting can be stressful for your plant, as the root part can get injured.
But when do you know it’s time for a repotting? Here are a few telltale signs that it’s time to give your Dracaena some new digs:
- Your Dracaena has outgrown its pot or container. If the roots are starting to peek out of the drainage holes and are lining the bottom of the container, it’s time for a bigger pot.
- Your Dracaena has been in the same container for over three years. If the growth has slowed and the leaves are yellowing, it’s time for a fresh pot of soil.
- Your newly purchased Dracaena is in a container with soil for transportation. While it’s great that the plant came with its soil, there are better long-term solutions. Give it a new pot and soil as soon as possible.
- You’re overwatering your Dracaena. Not only does this take away essential nutrients like calcium, potassium, and magnesium, but it can also acidify the soil and lead to root rot. If you notice gnats flying around your pot, it’s a sign that you must repot.

So, if your Dracaena shows any of these signs, it’s time to give it a fresh pot of soil and a new home. And don’t worry, repotting is like a spa day for your plant. It’ll be feeling refreshed and rejuvenated in no time!
If you just brought your dracaena home from the store, it’s best to wait until the beginning of spring.
That’s right, March and April, my friends. This is when the young plant will acclimate to fresh soil and start thriving, releasing fresh leaves.
But don’t worry; the entire growing season is a great time for transplanting. Dracaena can settle into a new pot in spring, summer, and even autumn.
And let’s be real, who wants to disturb their plant during the winter? So, if you bought your Dracaena in November or December, wait until spring.
And if you’re thinking about taking a cutting from the side of the sprout, it’s best to do it in the spring as well, as cuttings are more viable at this time.
But let’s say you can’t wait until spring, don’t fret. Instead, carefully follow the instructions and create ideal conditions for the plant during the adaptation period.
And remember, there are no secrets; only competent repotting and meticulous care will help the tree to survive “repotting” less traumatically.
Choosing the Perfect Container for Your Dracaena
When repotting your Dracaena, choosing the right pot is crucial. But how do you choose the right one? Well, let me tell you.
The root system of the Dracaena is known for developing deep down and having little lateral outgrowths. So, when choosing a container, you want to go for something high and relatively narrow.
If there’s insufficient space for root development, your plant will die faster than a plant in the desert without water.
If you notice that your plant was repotted recently, but the roots are already running out of space, it’s time to upgrade to a bigger pot.
The specific size of the pot is related to the size of your Dracaena. For example, if your plant is around 16 inches in height, the diameter of the container should be about 8 inches.
But be careful; buying a pot “for growth” is not always the best decision. The roots may not take root in a large volume of soil, leading to stagnant moisture, rotting, and, ultimately, the death of your plant.
The pot must have drainage holes. Otherwise, you’ll have to make them yourself. But if you’re using a plastic container, this is easy, but making holes is not recommended if it’s a ceramic product.
So, when buying, pay attention to the presence of drainage holes.
The material of your new pot is all about your personal preference and budget. For example, a dracaena will grow well in a basic plastic pot or an expensive ceramic one. However, ceramic is considered more eco-friendly.
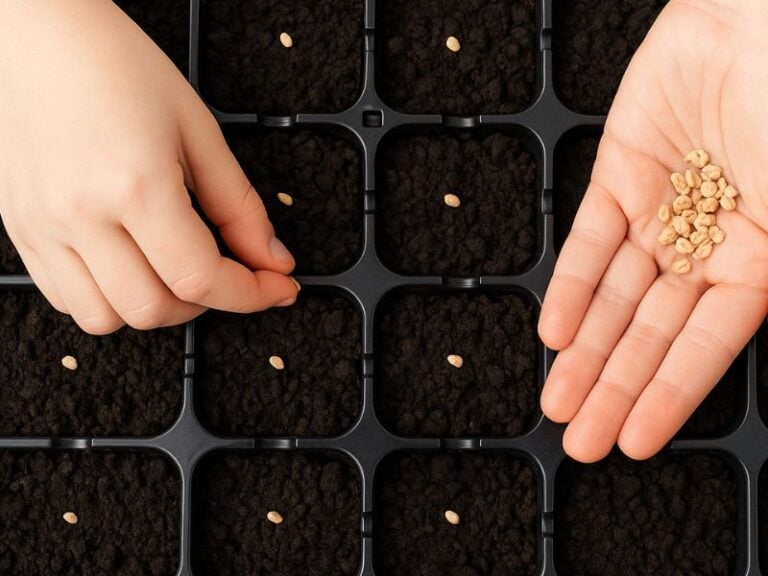
Finding the Perfect Potting Mix for Your Dracaena

When repotting your Dracaena, the soil is just as important as the pot. And you have two options: buy ready-made soil or make it yourself.
If you buy potting soil from a specialty store, look for soil made explicitly for indoor palms or large non-flowering plants.
False palms, like the Dracaena, thrive in moderately nutritious soil that’s well-aerated, neutral, or weakly acidic.
And only go for soil that contains a little pumice, perlite, or vermiculite, as it will have poor drainage capacity and soil aeration.
But if you decide to make your potting mix, follow these proven recipes:
Mix one-third of clay or loam garden soil, one-sixth of coarse sand, and one-sixth of pumice, perlite, or vermiculite for drainage. And you’ll have the perfect soil for your Dracaena.
Adding crushed red bricks or charcoal crumbs to your soil can do wonders for your plants.
Coal, well-known for protecting soil from fungal growth, and red bricks, which help loosen dirt and absorb excess moisture, are great options.
Your trees will also love coconut fiber, but ensure to soak the Coconut Charcoal Briquettes before adding them.
You can use crushed bricks, pebbles, styrofoam, vermiculite, or expanded clay as a layer to help with drainage holes.
These materials will help prevent water from building up in the soil and keep your plants healthy.
A Step-by-Step Guide to Repotting

Repotting a Dracaena plant can be a breeze, even if you’re new to gardening. The key is to be gentle and cautious, as the roots of a Dracaena are delicate.
Before you begin, ensure you have everything you need: potting mix, a new pot, distilled water, and pruning shears.
It’s also important to disinfect your pruning shears by rubbing them with alcohol or burning the tip over a fire.

Here’s the proper way to repot a Dracaena:
- Place a drainage layer in the pot. The layer should be at most 1 inch deep.
- Carefully remove the Dracaena from its old container.
- Remove all the soil above the plant’s roots, leaving some soil between the roots.
- Inspect the root system and remove any rotted or dry roots. If the underground part of the plant is larger than the upper part, carefully prune the roots. Shorten any roots that are crowding. Sprinkle charcoal or cinnamon on all cuts to dry them out and prevent fungal infection.
- Add a small potting mix to the top of the drainage layer in the new pot, pressing it down.
- Place the plant in the center of the container and spread the roots evenly over the pot. Keep the planting depth the same.
- Fill the pot with soil, shaking the pot a little to avoid air pockets. Gently compact the soil.
- Leave about 1 inch of space between the top of the soil and the top of the pot to make watering the Dracaena easy without risking overflow.
- Water the plant abundantly and spray the leaves.
- After the soil settles, add more soil if necessary.
- Clean the plant and pot with a damp sponge after half an hour, and drain any excess water from the tray.
By carefully following every step and not skipping any details, you will increase the chances of your Dracaena successfully taking root in its new pot.

After repotting, your Dracaena will need extra TLC. First, give it a warm and peaceful environment, away from drafts or harsh sunlight. Bright lighting is okay but avoid direct sunlight.
When it comes to caring, it’s important to take it easy. Overwatering is the biggest threat to a newly repotted Dracaena.
The roots have yet to settle in the new soil, so there’s a risk of not absorbing moisture and the soil becoming waterlogged.
This can lead to soil acidification and root rot. Wet soil is also a breeding ground for pests and fungi, so careful with watering too much.
When repotting your Dracaena, it’s common for things to go wrong. For example, the plant may lose its leaves, wither, or even drop them.
As a grower, it can be frustrating not to understand the cause of these problems. But don’t worry; common mistakes can be easily avoided.
One of the most common problems is choosing the wrong soil. Beginner growers may use whatever mixture is available, assuming the plant won’t notice the difference.
However, Dracaena cannot tolerate heavy, compact soil. If you choose soil with a high concentration of peat, it’s also unlikely to take root, as peat is naturally resistant to moisture.
The solution to this problem is to repot the plant again, using suitable soil.
Common Pitfalls to Watch Out For When Repotting Dracena
Repotting your Dracaena can be a great way to give it new life, but sometimes things don’t go as planned.
You may notice that your plant is losing leaves, wilting, or even dropping them. It can be disheartening but don’t worry; these problems have common causes that can be easily avoided.
- Selecting the wrong soil. It’s easy to grab any soil mixture available, but Dracaena doesn’t like heavy or compact soil. If you use soil with a high concentration of peat, your plant might not take root as peat is naturally resistant to moisture. The good news is that the solution is easy, repot your plant again, but this time, use suitable soil.
- Repotting in the wrong size pot. If the pot is too big compared to the size of the plant, it can lead to overwatering and soggy soil. This can create a damp environment that can encourage fungal growth and cause the roots to rot.
- Overwatering after repotting. It happens when you water your plant too often or give it too much water. As a result, the soil in the pot becomes soggy and doesn’t dry out. The plant starts to wilt, and the grower thinks it needs more water, so they water it again. This cycle can lead to the death of the plant. To avoid this, make sure to remove any excess water from the tray, wait for the top 1 inch of soil to dry out before watering, and if the situation gets worse, dry out the soil by taking it out of the pot and placing it on paper in a dry and warm place.
- Repotting at the wrong time. As a novice grower, it’s easy to make the mistake of repotting at the wrong time of year. If you repot your plant in late fall or winter, it will have a more challenging time adjusting to its new environment and may need help to survive. Additionally, if you keep your repotted Dracaena in a cool room, it’s likely to freeze but if you have to, place it near a comfortable heat source indoors. It’s best to repot your Dracaena in the spring or summer.

Fight dry air and keep your Dracaena healthy with a DIY pebble tray humidifier. It’s easy to make and can make a big difference for your plant.
Don’t worry if you notice some yellow leaves appearing on your Dracaena in the first few days after the big move.
For about two weeks, this is entirely normal. However, if the yellowing persists after that, it’s time to take action.
Chances are, your plant is getting too much water. To fix this, reduce the amount you’re watering your Dracaena.
Overwatering can be as harmful as underwatering- learn more about the perfect watering balance in another article.
On the other hand, if you notice the palm leaves of your Dracaena becoming brownish at the ends, it’s likely a sign of dry air. But before you start misting your plant, consider whether you have overfed it.
Believe it or not, sometimes overfeeding can cause this issue. So, hold off on fertilizing your Dracaena for at least two to three months after repotting.
The soil you’ve chosen should have everything your plant needs for healthy growth, and adding new fertilizer could do more harm than good.
Lastly, if you notice the leaves of your Dracaena turning black, it’s probably a sign that the room is too cold.
Check if your plant is standing too close to a window or if its tips are touching the cold glass. If so, move it to a warmer location to help it thrive.
Repotting can be tricky for your Dracaena, but with some care and attention, your plant will return to its healthy self in no time!
Transform your Dracaena Marginata into a one-of-a-kind masterpiece with my guide on caring, bending, and shaping techniques. Don’t miss out; read it now!